FIELD & FOREST

brunch

rosemary biscuits + blood orange shortcakes

breakfast, desserts, sweet, vegetarian, winterRachel SandersComment

So my best laid plan to get these biscuits + shortcakes to you for Valentine's Day was a bust. I had grand visions of breakfast in bed with coffee and artfully plated shortcakes for my own Sunday celebration, but in reality, I nuked a tortilla and wrapped it around some avocado slices and then went skiing with Richard. Ha! Oh well.

I think sometimes there's a little too much pressure to do something grand for Valentine's Day. And it's not really worth it to make everything perfect and photogenic and complicated if it keeps you from being relaxed and having fun and spending quality time with your significant other/best friend/dog/chickens/self. Plus, I like breakfast-in-bed stuff all of the time, not just on Valentine's Day!

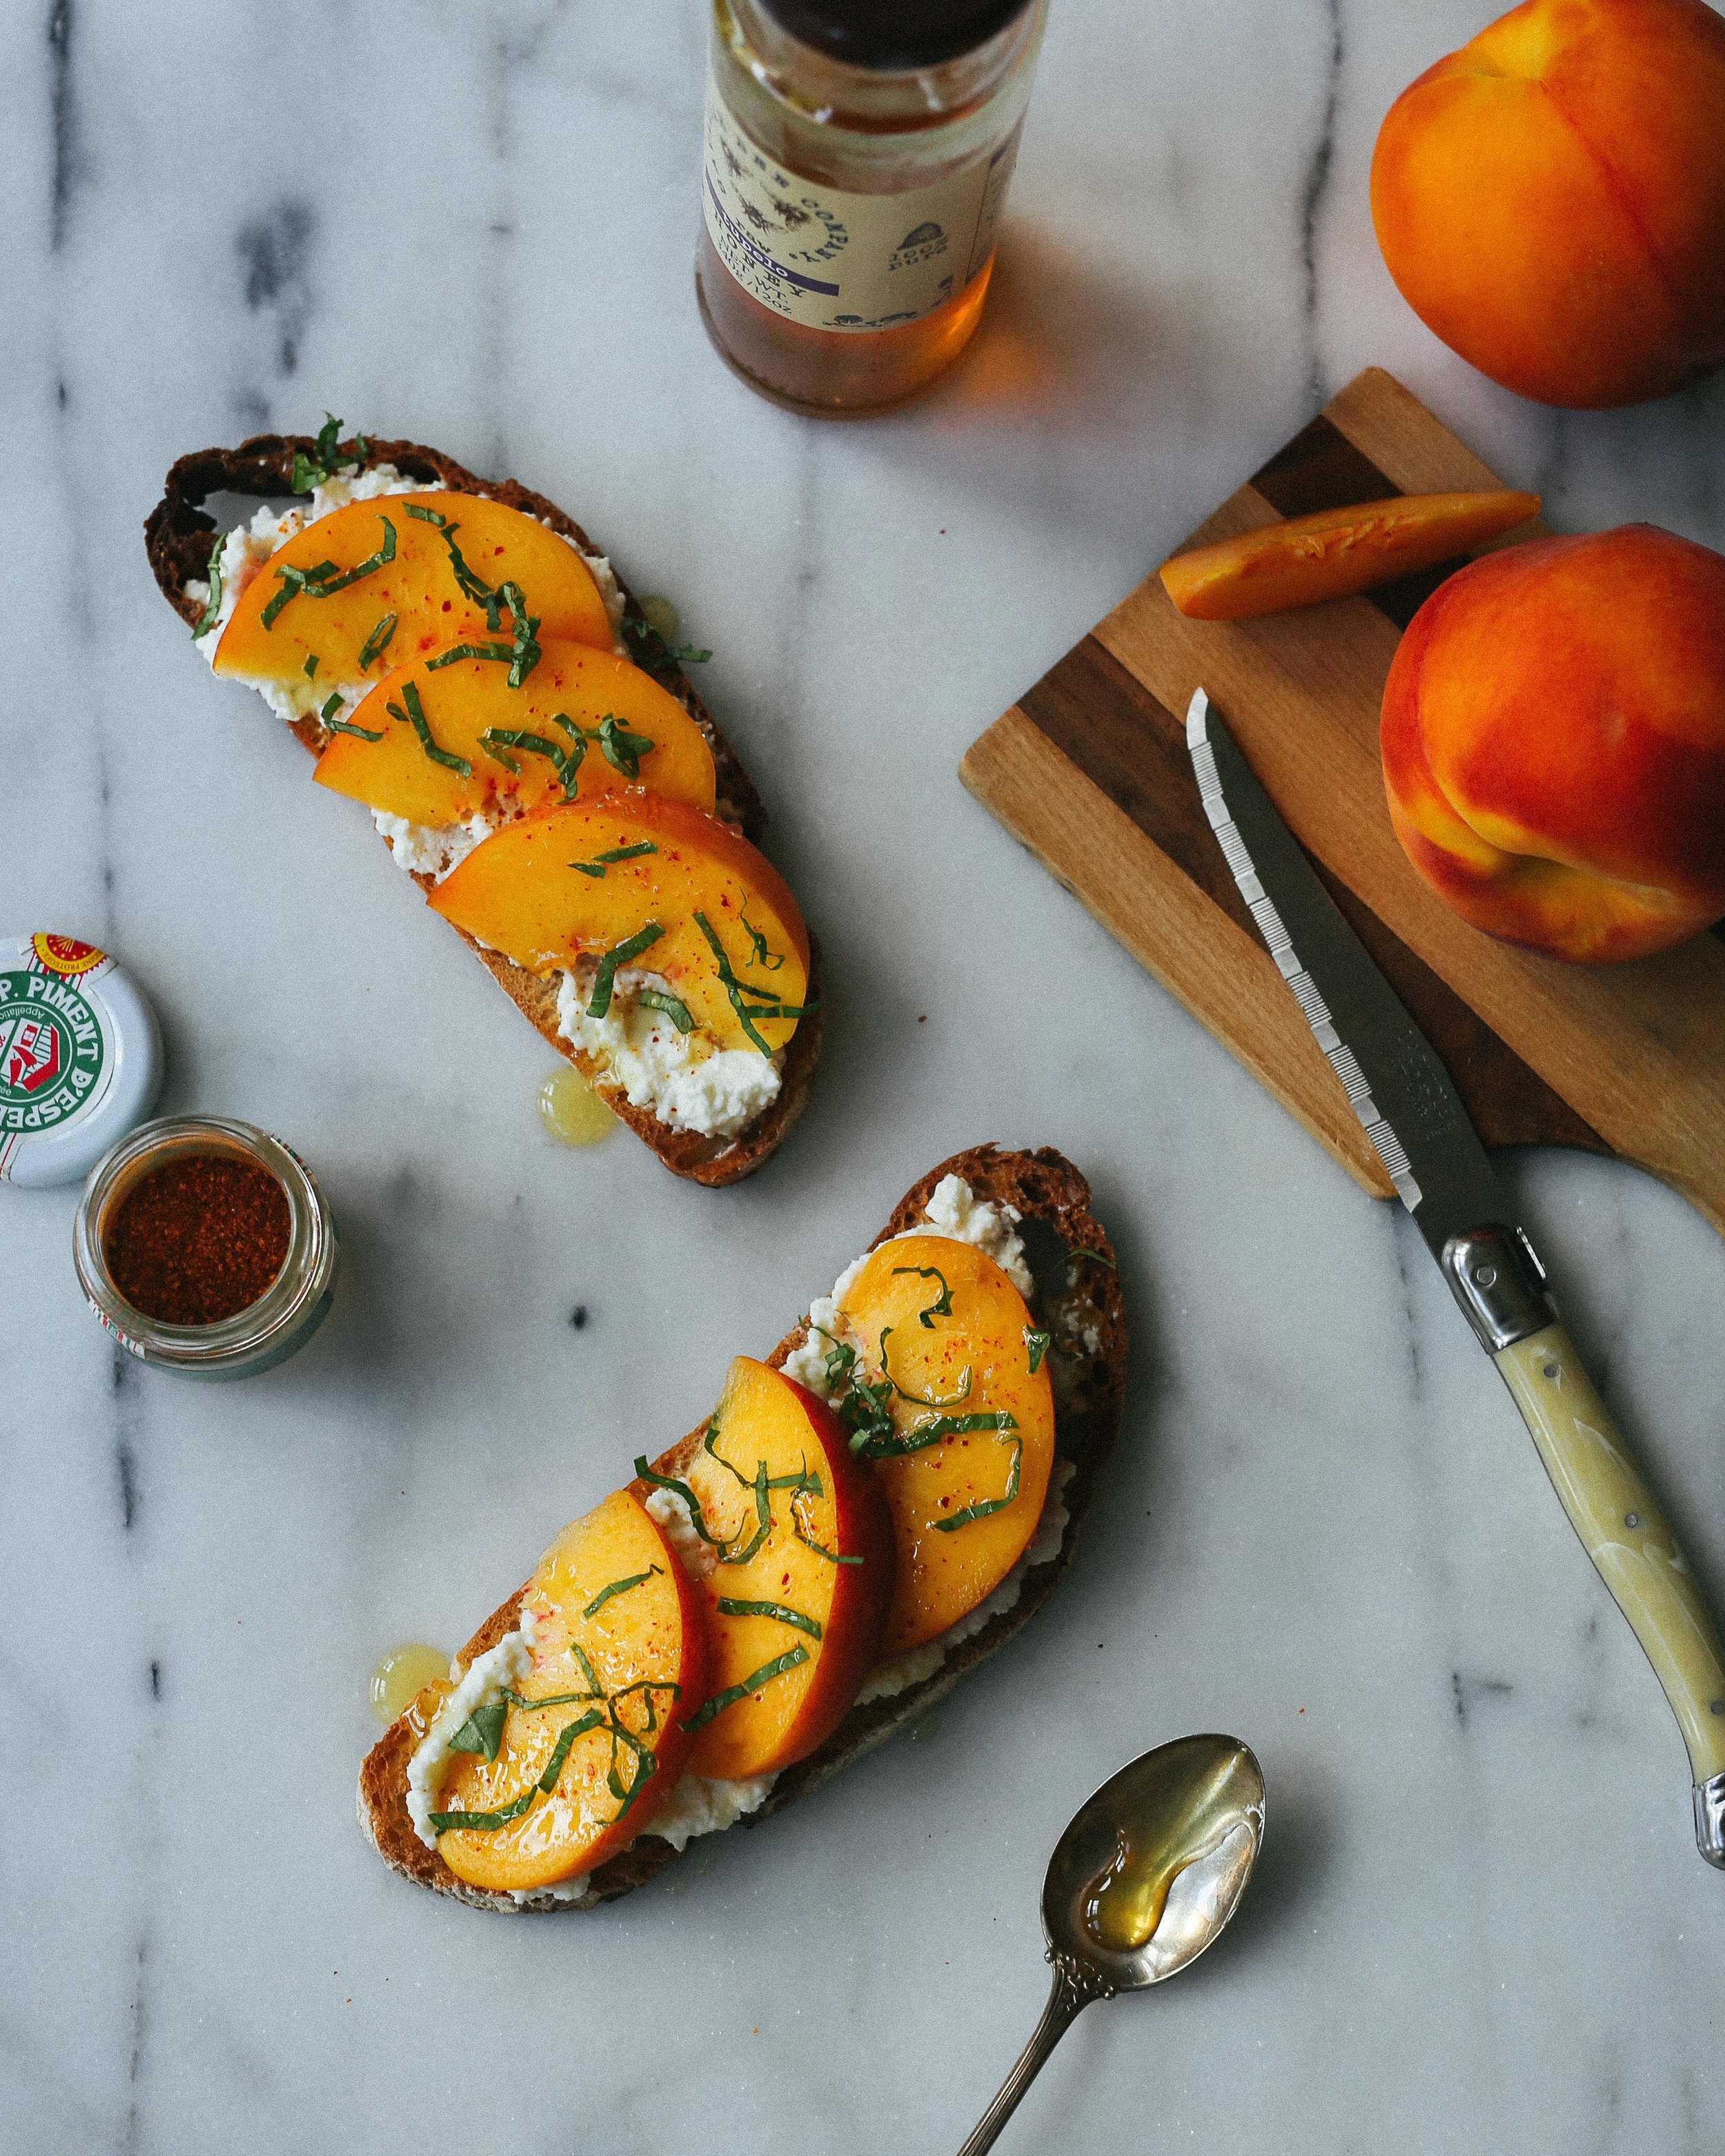
So I'm here to say that I hope you had a lovely and wonderful Sunday holiday morning, no matter what you ended up doing, and offer you a fabulous little breakfast idea for the next time you want to express "hey, I like you!" sentiments to someone important in your life. Especially if that someone is yourself.

4J5A0185.jpg

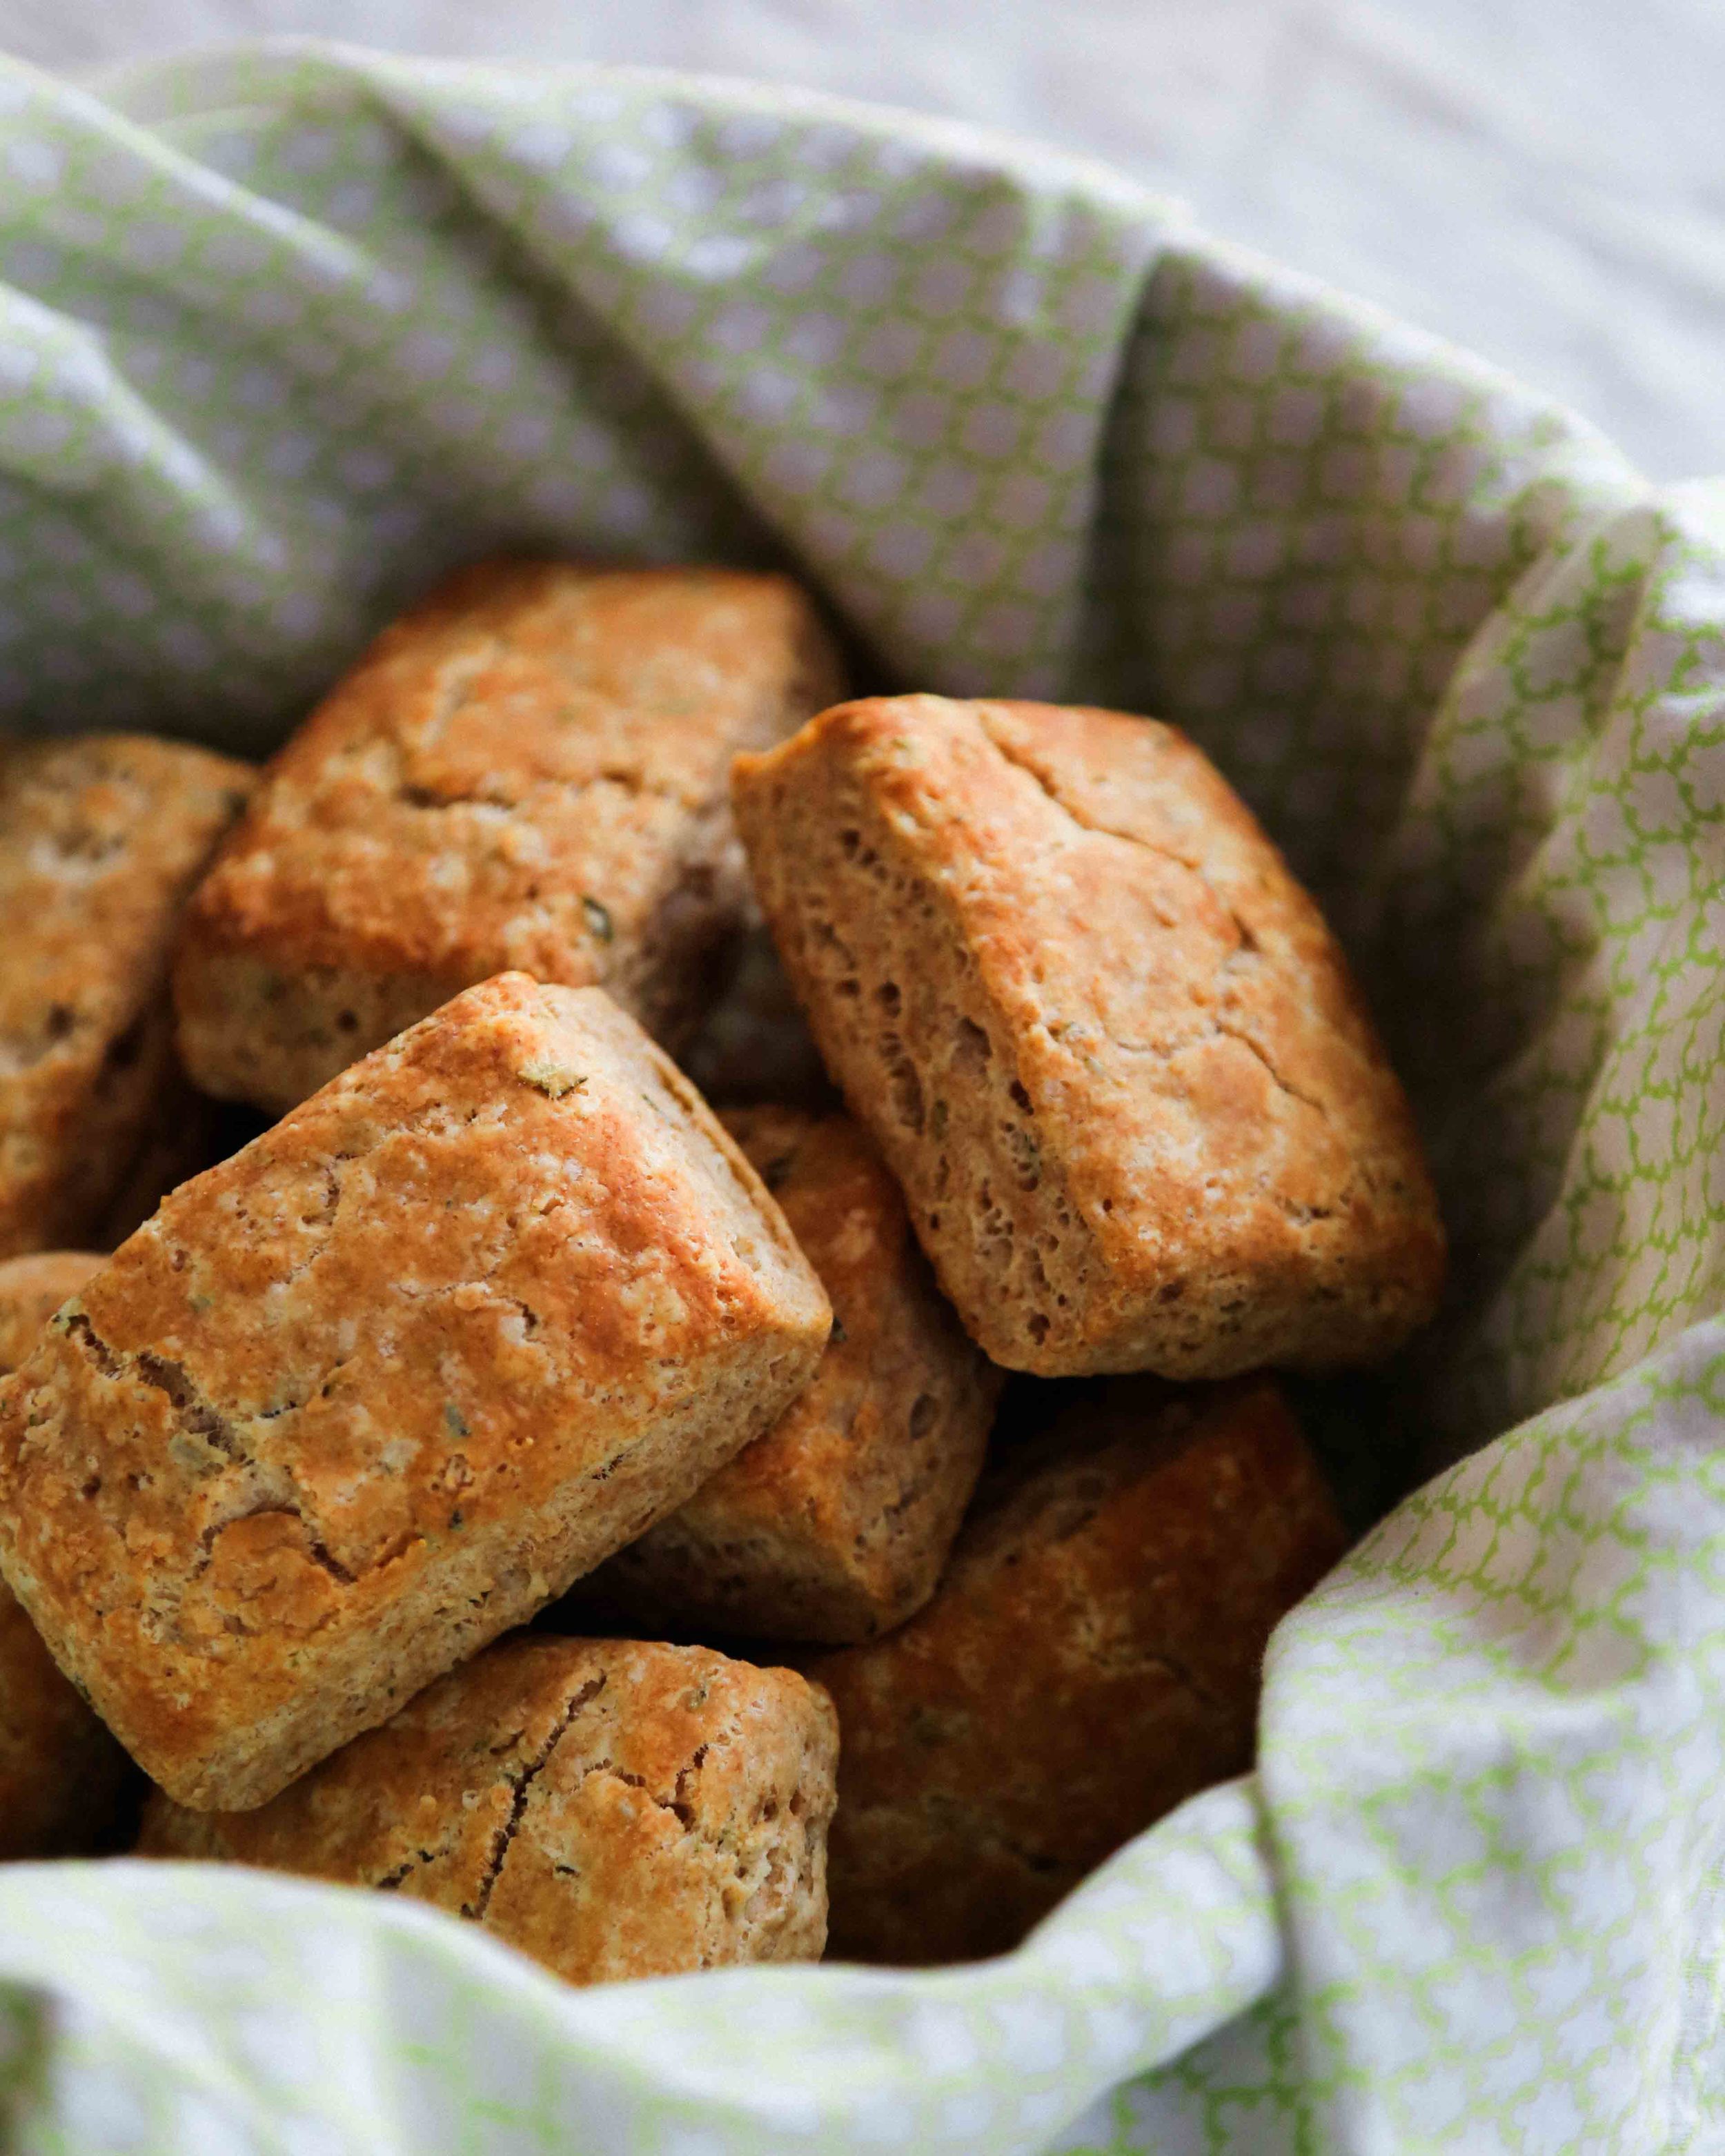
I have made these biscuits so many times that the cookbook containing the recipe falls open to the biscuit page each time I take it out of the bookshelf. They are Heidi Swanson's biscuits, and they are amazing. We mix up the flour proportions and types sometimes, but we're pretty committed to putting yogurt in our biscuits at this point.

Here's the low-down on choosing your yogurt for this recipe: a) tangier is better, in our minds, because it makes a more flavorful biscuit, b) Greek yogurt makes for taller, more layered biscuits, while a more liquid yogurt means flatter, but still very tender biscuits, and c) any (plain) yogurt you have on hand is perfect for this recipe, because it will make for delicious biscuits no matter their height.

I used a fairly liquid, goat's milk yogurt for the biscuits pictured here. You don't have to use goat's milk yogurt (it's just something we keep around most of the time), but I think a thinner biscuit is better for shortcake purposes, since you get a higher ratio of cream and fruit to biscuit.

In case you are wondering, no, I have never tried making these with a non-dairy yogurt. They could be great! They could be awful! Who can say! I'll let you experiment with this.

Makes 10-12 biscuits/shortcakes

You should feel free to experiment with these biscuits to take them further toward sweet or savory. You can brush them with a little cream or milk and sprinkle them with Turbinado sugar to give them a sweet, crunchy top. You can also change the herbs depending on how you plan to serve the biscuits, or omit them altogether.


For the biscuits:

1 1/4 cups whole wheat pastry flour
1 1/4 cups unbleached all-purpose flour, plus more as needed for dusting
3 teaspoons kosher salt (or 1 1/2 teaspoons table salt)
1 tablespoon aluminum-free baking powder
1 1/2 tablespoons chopped fresh rosemary (or more or less, depending on how much you like rosemary
1/2 cup unsalted butter, chilled and cut into tiny cubes
1 1/3 cups yogurt (again, Greek for higher, more layered biscuits; more liquid for shorter, tender biscuits)


Preheat the oven to 450˚F and place a rack in the center of the oven. Line a baking sheet with parchment paper and set aside.

Combine the flours, salt, baking powder, and rosemary in the bowl of a food processor, and pulse 2-3 times to mix. Sprinkle the cubes of butter over the dry ingredients and pulse 15-20 times (or more) until the mixture resembles (in Heidi's words) "tiny pebbles on a sandy beach."

Add the yogurt and pulse a few more times until just incorporated. Avoid over-mixing, as this will toughen the biscuits.

Gather the dough into a ball and turn out onto a lightly floured surface. Gently press the dough together, kneading 2-3 times if necessary, and shape it into an inch-thick square. Cut in half and place one half on top of the other. Flatten with your hands or with a rolling pin into another inch-thick square, cut in half, and stack again. Repeat each step one more time, then press the dough into a 3/4-inch thick rectangle. Cut the dough into 10-12 equally sized biscuits.

Transfer the biscuits to the baking sheet, leaving 1/2-inch of space between each biscuit. Bake for 15-20 minutes, until the bottoms are deeply golden and the biscuits are cooked through.

Scroll down for notes on making/plating the shortcakes.

Serves 2


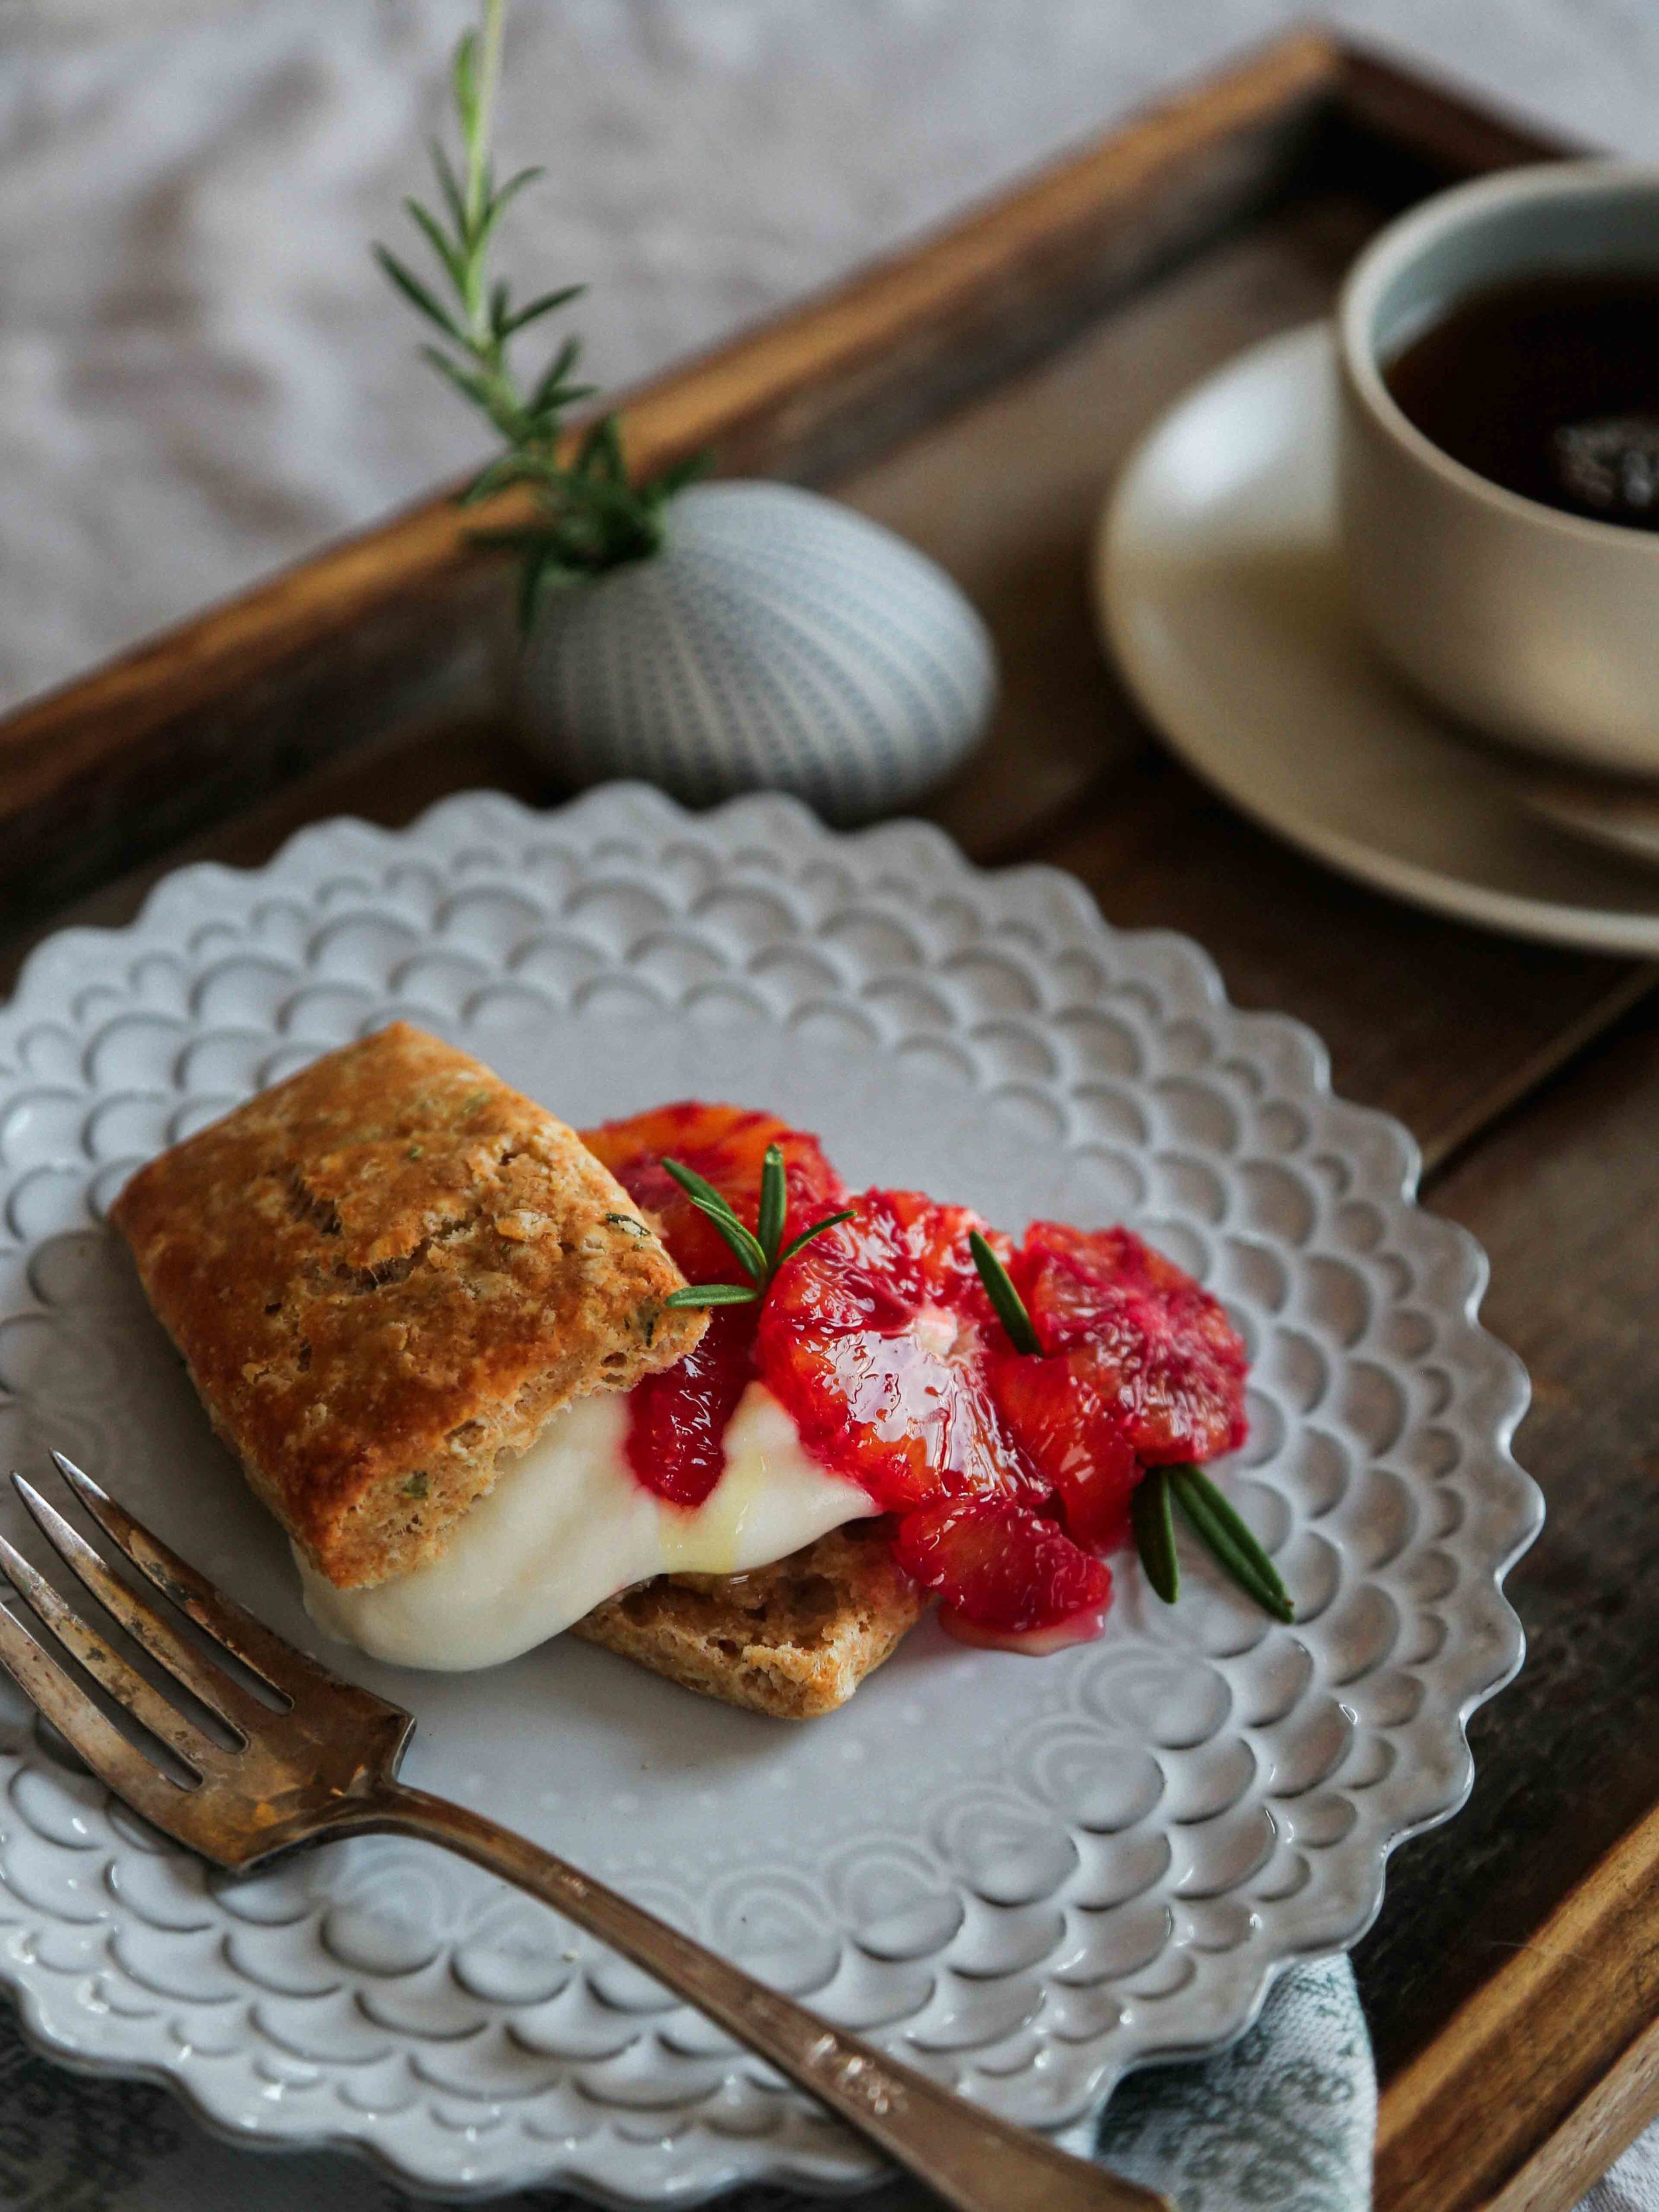
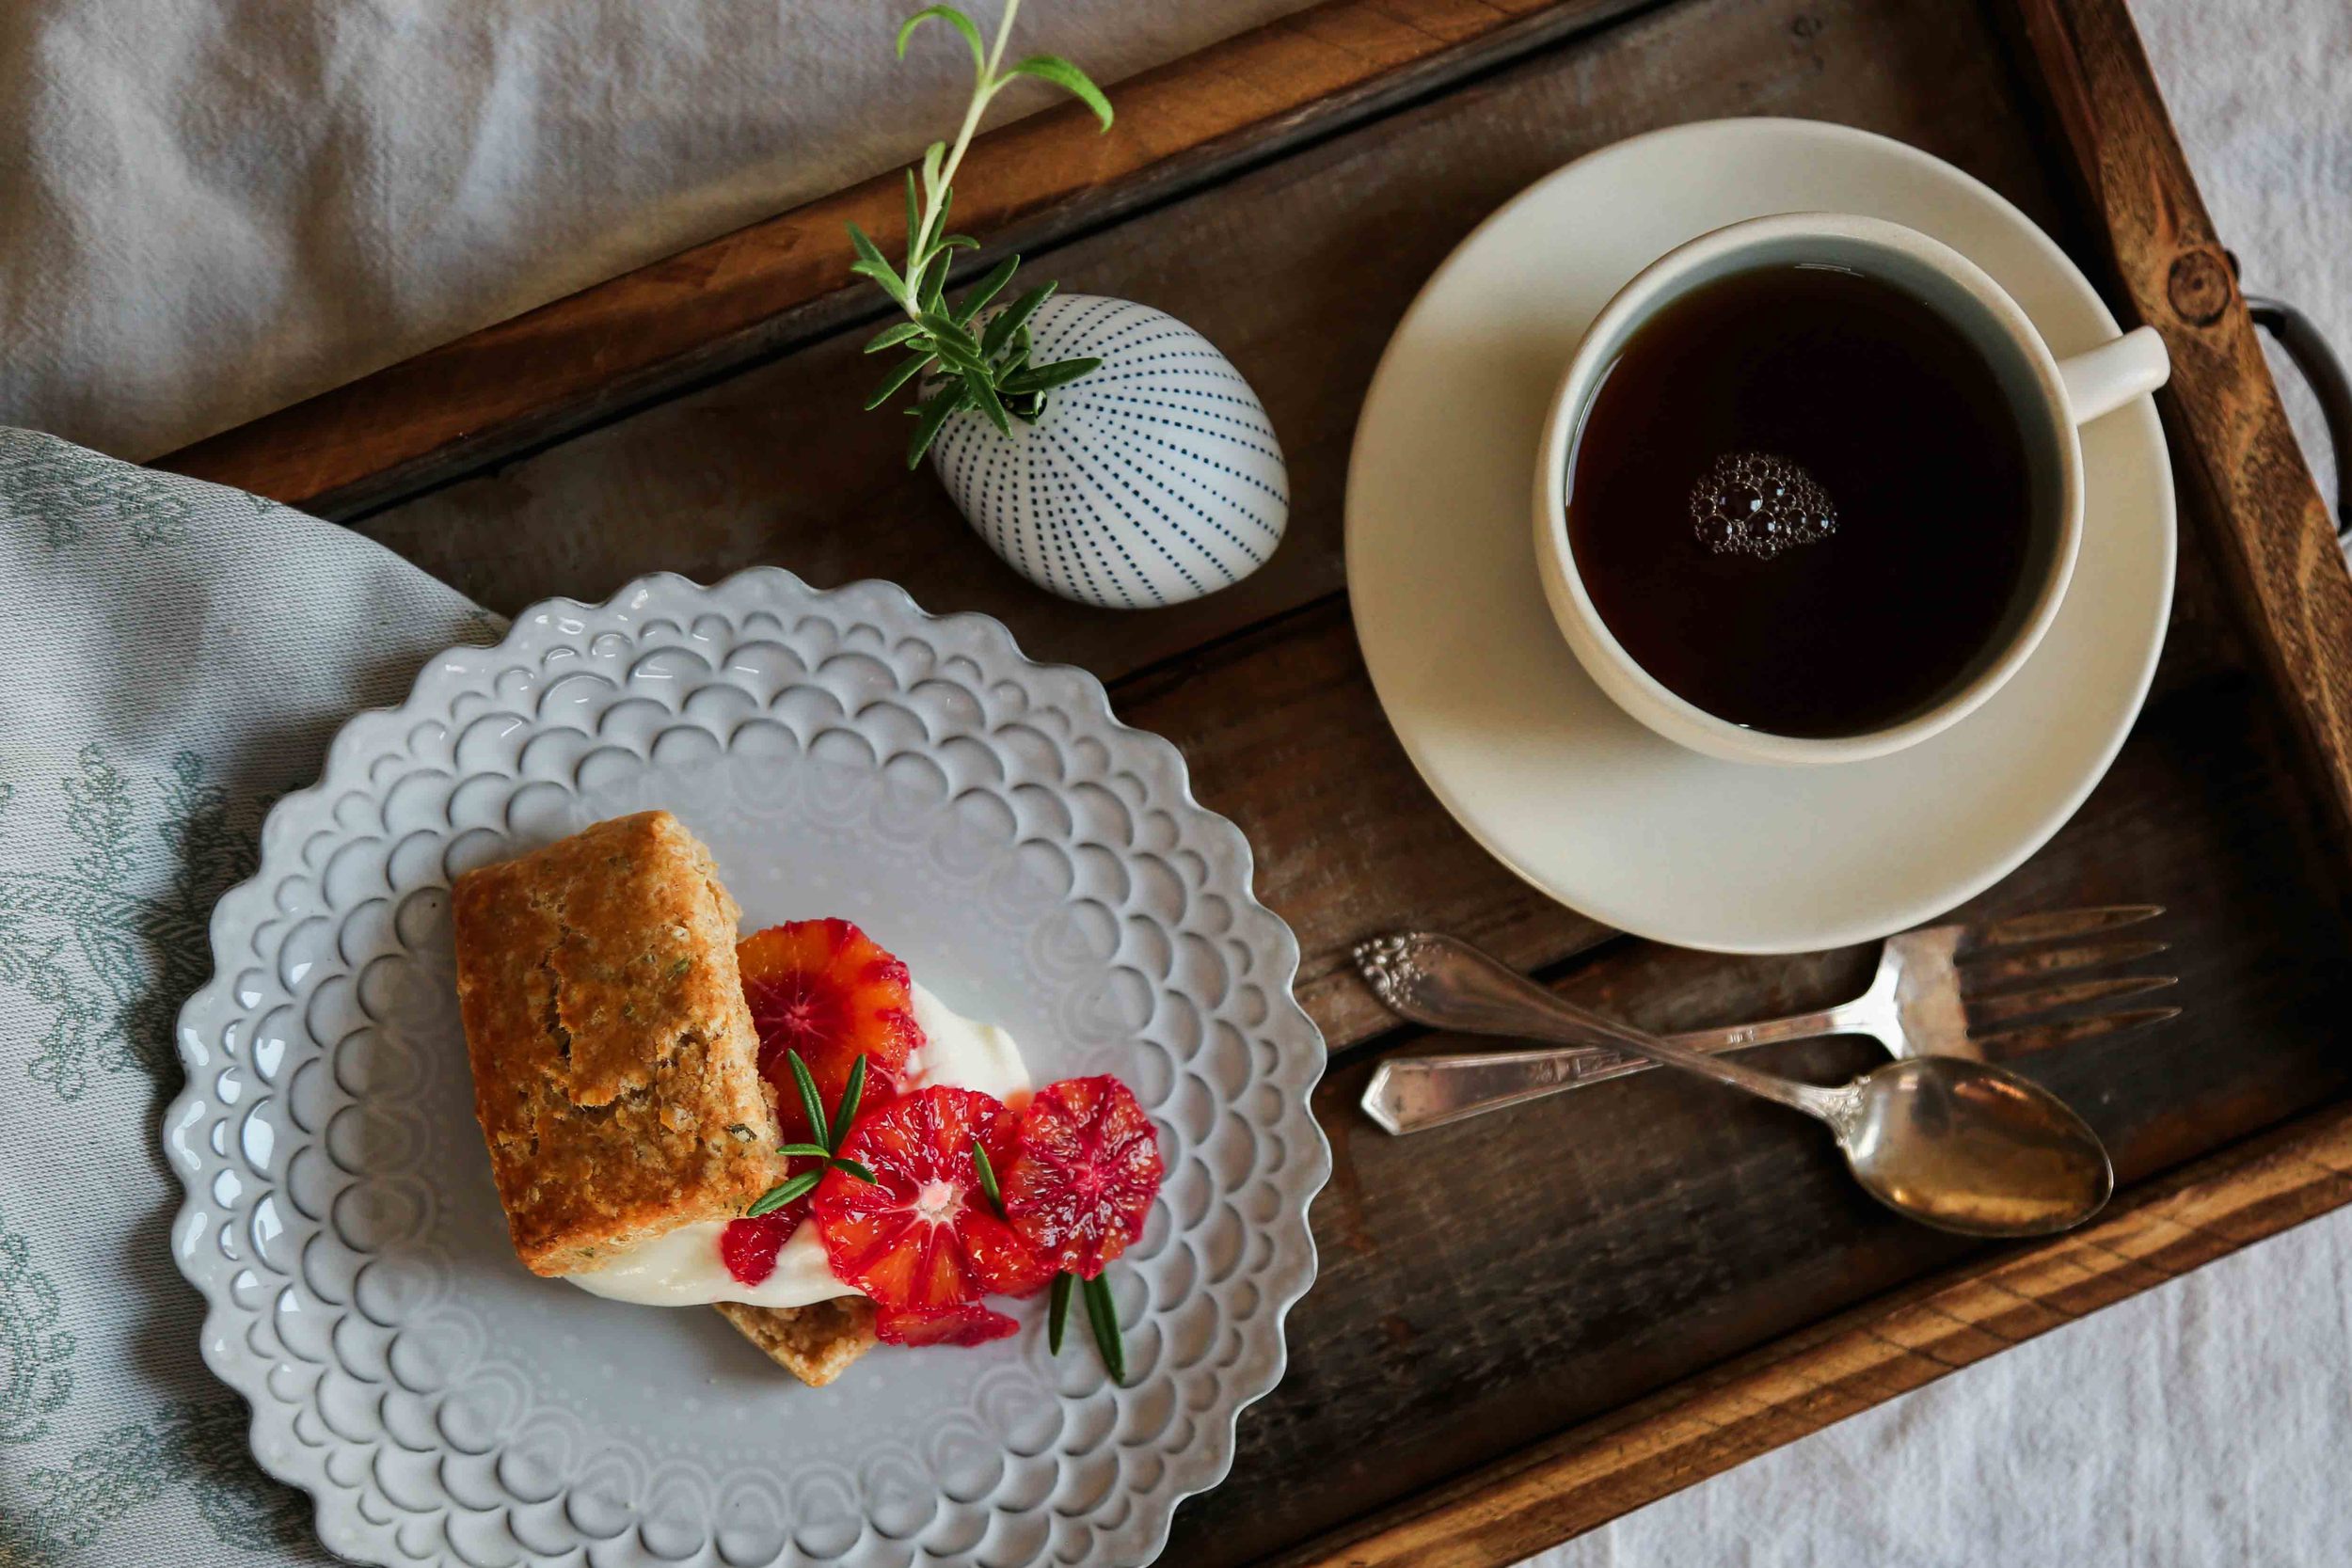
Split the biscuits and place each bottom on a plate. Spoon the yogurt cream evenly over the two biscuit bottoms. Arrange the blood orange slices over the cream, and drizzle with honey. Pick some rosemary leaves from the springs and tuck in among the orange slices. Angle the biscuit tops over the shortcakes so that much of the fruit and yogurt is visible. Serve immediately and tuck in! 

2 rosemary biscuits
Yogurt cream (enough to serve 2 = 1/4 cup cream whipped with 1/4 cup yogurt and 1/4 teaspoon vanilla)
2-3 blood oranges, peeled, seeded, and sliced
Honey
1-2 rosemary sprigs


marie-hélène's apple cake with cardamom and orange blossom

autumn, breakfast, desserts, sweet, vegetarian, winterRachel SandersComment

Being a grownup is hard. You have to deal with unforeseen and sometimes high-stress life situations, you have to keep a level head when really you feel like exploding all over the place, and you are solely responsible for managing your cake intake. I feel like we're doing okay with the first two things this week, given that we've been experiencing some wily circumstances (long story for a future post), but to say I managed my cake intake would be a gross overstatement.

This is a good cake to keep around in these kinds of times, primarily because it is delicious, but also because it is mostly apples! So eating a bunch is NBD. Which is good, because I'm actually eating another piece as I write this post. #grownupdecisions

(Update: this cake is now gone! We ate it all. Sorry/not sorry, local friends.)

I feel that I must point out that the original recipe for this cake (from Dorie Greenspan) contained rum instead of the cardamom and orange blossom water. Rum and I haven't been friends since an unfortunate incident in college involving a very boozy drink served in a hollowed-out pineapple, hence the change in flavor additions. But if you would like to go Dorie's route, nix the cardamom and orange-blossom water and add in 3 tablespoons of rum. I think I'm going to make this with 3 tablespoons of Applejack (brandy and I are still friends) and a pinch of cinnamon and nutmeg next time, so I'll let you know how that goes when I give it a try.

I would like to say, though, that the cardamom and the orange blossom water made the whole thing smell REALLY good while it was baking. Really, stupid good. Plus, even without the booze, the cake was still incredibly moist and never dried out, even though we left it unwrapped as per the original recipe's instructions. That is impressive for any cake in our bone-dry state.

One more note: there really are a lot of apples in this cake! It won't feel like there's enough batter to hold them all, but there is, trust me. You can move the apples around a bit in the pan to spread out the mixture evenly, but believe that the batter will help to fill in the cracks and empty parts.

makes one 9-inch cake - serves 8 (or maybe just 2)
(adapted from Dorie Greenspan's recipe in Genius Recipes)
 

I didn't peel my apples when I made this cake, and I'm very happy I made that decision. Because I used some Pink Lady Apples, the bright pink peel caused the apple flesh to blush in the oven, and gave this cake really lovely pops of pink. Plus, I feel that there is enough flavor in the peel that I'm more than willing to risk the slight hesitation in texture it gives to each bite. You may peel your apples if you disagree.


3/4 cup all-purpose flour
3/4 teaspoon baking powder
pinch of salt
1 teaspoon cardamom (freshly ground, if possible)
4 large apples (use different kinds, if you can! I used two Pink Lady, one Fuji, and one Opal)
2 large eggs
3/4 cup sugar
2 teaspoons orange blossom water
1/2 teaspoon pure vanilla extract
1/2 cup unsalted butter, melted and cooled


Place a rack in the center of your oven and preheat the oven to 350˚F. Generously butter and flour an 8 or 9-inch springform pan, and place it on a baking sheet.

Whisk the flour, baking powder, salt, and cardamom together in a small bowl. Cut the core from the apples and cut the apples into 1-inch chunks.

Break the eggs into a large bowl and whisk until foamy. Add the sugar and whisk to blend well. Whisk in the orange blossom water and vanilla extract. Add half the flour mixture to the bowl and whisk until just combined. Add half of the butter mixture and whisk until just combined. Repeat with the remaining flour and butter, mixing gently after each addition. You will have a smooth, thick batter.

Using a rubber spatula, fold in the apples, turning the fruit so that it is coated with batter. Scrape the mixture into the prepared springform pan, and move it around a bit so that there aren't any large holes or gaps, and so the mixture evenly reaches the inner walls of the pan.

Slide the baking sheet with the pan into the oven, and bake for 45-60 minutes (begin checking the cake at 45 minutes), until the top of the cake is golden brown and the center of the cake springs back when touched. Transfer to a cooling rack and let rest in the pan for 5 minutes.

Carefully run an icing spatula or a thin knife between the cake and the pan, and remove the sides of the springform pan, making sure there aren't any apples stuck inside the pan. If you want to remove the bottom of the springform pan from the cake, wait until the cake is almost completely cooled and run a long spatula between the pan's bottom and the cake. Cover the top of the cake with a piece of waxed paper or a clean, lint-free dishtowel, and invert onto a rack. Carefully remove the bottom of the pan and re-invert the cake onto your serving plate.


We ate this warm, at room temperature, and after it had sat around for a bit. It is great each and every way! Dorie recommends NOT wrapping this cake, as it is so moist that it will cause the nice, crusty edges of the cake to become a bit soggy. After testing this cake in one of the driest states in the Union, we concur. Simply place a piece of waxed paper against to cut parts of the cake to keep them from drying, or just cut off any dry-ish parts before serving and eat them yourself. :)


chiogga beet tart with ricotta, walnuts, and lemon thyme

autumn, breakfast, dinner, lunch, main dishes, spring, summer, vegetarianFieldandForest1 Comment
4j5a7882.jpg

I've rewritten this post a number of times. Each time has been a bit too verbose, a bit too flowery in waxing about the farmers' market, a bit too enthusiastic without really giving you the meat of the recipe. I mean, really. This is a tart. It's nothing we haven't seen before.

That said, this particular tart is a combination of one of Richard's favorite things, which is pie, and one of my favorite things, which is salad. I'm thinking "salad pie" sounds quite oxymoronic, not to mention sort of gross, so we'll keep calling this a vegetable tart. But really, the only reason why this tart is cooked at all once it is assembled is so that you can eat it hot. By all means, if your ingredients are still warm from cooking (or if you've cooked everything far in advance and are cool with eating your tart cold, salad style), you can feel free to fill up the tart shell with all of your goodies and immediately go to town.

Voila, veggie tart!

Chiogga Beet Tart with Ricotta, Walnuts, Caramelized Onions, and Lemon Thyme Makes 1 9-inch tart - Serves 6

Notes: A minimum 1-inch tall tart, quiche, or springform cake pan is recommended for this recipe to make sure your tart shell can hold all of the ingredients. Blind baking the shell is necessary as the ricotta is rather wet and the shell will not properly crisp in the oven if filled while unbaked. Be sure to read the instructions in full, as I gave them to you all mashed up together in the order in which I cook the various elements for the tart (I've emboldened the points at which various things are cooked, Joy of Cooking style, to try and clarify my process)! You can also always roast your beets, sauté your greens, and caramelize your onions ahead of time and then blind-bake your tart shell on the day you plan to bake your fully assembled tart.

3 pounds baby chiogga or yellow baby beets, with greens attached
olive oil
1 package all-butter puff pastry, such as Dufour, defrosted according to the package instructions (I'll often leave mine in the fridge overnight)
2 medium yellow onions, thinly sliced from top to tail
2 tablespoons butter
2 cloves garlic, minced
1/2 pound whole-milk ricotta cheese (basket ricotta is a good option, as it will be partially drained and less wet than normal ricotta)
1/2 cup coarsely chopped walnuts
2 sprigs lemon thyme or regular thyme, leaves removed from stems
kosher salt, to taste
flaky sea salt, such as Maldon, to taste

Preheat your oven to 400˚F.

Cut the greens away from the beets. Thoroughly wash both the beets and the beet greens, and set the greens aside. To roast the beets, place the beets on a large square of aluminum foil and drizzle with olive oil and sprinkle with a large pinch of kosher salt. Tightly wrap the foil around the beets, and place on a baking sheet to catch any juices that may leak. Roast in the oven for 30-40 minutes, until tender (I test this by piercing a beet with a paring knife).

While the beets are roasting, roughly chop the beet greens, and sauté them in a drizzle of olive oil in a heavy-bottomed pan or skillet over medium heat until they are wilted, but still quite bright green. Season with a pinch of salt, and remove from the heat, and set aside.

Wipe out the beet green pan, and place over medium-low heat to caramelize your onions. Melt the butter in the pan, and add the onions, stirring to coat them all in the fat. Cook, stirring occasionally, until the onions have softened and are translucent, about 15 minutes. Make a well in the center of your onions, add a drizzle of olive oil if the pan is dry, and add your minced garlic to the well. Let the garlic cook for 20-30 seconds, before mixing it into the onions. Add a large pinch of salt to the pan, increase the heat to medium-high, and cook, stirring occasionally, until the onions' color has reached a deep amber. Deglaze the pan with a little water to stir up any lovely caramelized bits on the bottom of your pan, cook for another 30 seconds or so, and remove the onions from the heat.

While the onions are cooking, check your beets. Once they are tender, remove the whole packet from the oven, and let them cool while still wrapped in the foil. Decrease the oven temperature to 375˚F for blind-baking your tart shell.

Flour a baking surface and roll out the puff pastry so that it can easily line a 9-inch x 1-inch tart or quiche pan. Drape the pastry over the pan, and press it into the bottom and sides of the pan. Use scissors or a bench scraper to cut the puff pastry just above the edge of the pan, so the pastry is slightly taller than the pan (it will shrink a little during blind baking, and this will help ensure that it doesn't end up too low in the pan). Place the lined pan on top of a baking sheet for easy maneuvering in and out of the oven.

Prick the bottom of the pastry all over with the tines of a fork. Line the inside of the pastry shell with a piece of parchment paper, and fill with pie weights or dried beans (this, plus the pricking, helps keep the puff pastry from puffing up during blind baking). Bake in your preheated oven for 25-30 minutes, or until the pastry is golden and crisp (start checking it at 20 minutes). Set aside.

Peel your cooked beets, and cut them into wedges. Lightly toss them in a little (1-2 teaspoons) of olive oil along with the lemon thyme.

To assemble your tart, spread the caramelized onions evenly over the bottom of the pastry shell. Spread the ricotta evenly over the onions, and top with the beet greens. Place the beets on top of the greens. Bake at 375˚F for 15-20 minutes, until the tart is hot. Remove from the oven and drizzle with a little more olive oil before sprinkling with a few good pinches of flaky salt. Let the tart sit for a couple of minutes before removing it from the pan and cutting into wedges. Serve hot, warm, or at room temperature.

ricotta tartines with peaches, basil, and piment d'espelette

autumn, breads, breakfast, desserts, snacks, summer, sweet, vegetarianFieldandForest2 Comments
4j5a77861.jpg

I don't know about you, but I have jumped hardcore onto the ricotta toast bandwagon. It is SO good! Why is it so good? Why can I not stop myself from eating ricotta toast? Seriously. After I took the above photo, I ate those two tartines, and then I wanted more, so I made two more. And then I ate those. And I am seriously considering toasting up some more bread and making another. Somebody come save me from myself, please! I will repay you with a tartine. And then someone else will probably have to come save you from eating tartines at some point, too, and if the cycle continues, we will have so many people at our place eating tartines, which means at that point we'll just have to have a party.

Which works out, since it's FRIDAY (yay!).

Happy weekend, all!

Ricotta Tartines with Peaches, Basil, and Piment D'Espelette
makes 4 tartines

Why call this a tartine? Tartines are often substantial, open-faced sandwiches, and are frequently eaten with knives and forks. The peaches here are cut into rather thick wedges, and the moisture from the ricotta can make the center of your toast a little soft, so these lack some of the structural integrity needed to lift the bread to your mouth (and are a little tall for you to take a bite directly out of one, anyway) and are best eaten with utensils. Hence, tartines! Shrink these down and make them with toasted baguette slices if you want something that lends itself better to finger food.

4 1/2-inch slices of crusty white bread, such as sourdough or ciabatta (do not use a soft, sandwich bread, as it will get mushy)
olive oil1/2 cup ricotta (whole or part-skim both work well)
1 ripe yellow peach, cut into 12 wedges (quarter the peach, and cut each quarter into thirds)
4 basil leaves sliced into chiffonade (ribbons)
honey, for drizzling (I used Tupelo honey, which I love as it is intensely floral and buttery, plus it never crystalizes) Piment d'Espelette, hot paprika, or a finely crushed dried red chile

Brush the bread with olive oil and toast under the broiler until browned and crispy (this happens quickly, so keep an eye on it as it toasts).

Spread about 2 tablespoons ricotta over each of the toasts. Lay three peach slices over each toast, and distribute the basil evenly among the toasts. Drizzle each tartine with about a teaspoon of honey (or more, if you prefer), and sprinkle with a small pinch of Piment d'Espelette. Serve immediately.

baked oatmeal with apples, rhubarb, almonds, and pepitas

autumn, breakfast, desserts, spring, sweet, winterFieldandForest2 Comments
4j5a5904.jpg

I know, I know... what, pray-tell, is this apple and nut-crumbly topped thing doing here in May. Would you believe that the Northern Utah high desert, land of the fourteen-day spring, has developed a Seattle-esque languor of thunderstorms and wind? That we've been slathering on sunscreen in the morning only to throw on our rain shells and boots in the afternoon (or vice versa)? That I haven't had to water my garden once in the past week and a half? That the ski resorts have closed for the season even though we've had an additional 16 inches of snow in the mountains in past 72 hours?

It is crazy-town.

But it's reinvigorated our desire for baked and braised and stick-to-your-ribs things for the time being, as we are feeling these feelings of homebody-ness and the need for thick socks and weekend mornings spent on the carpet with bowl food and Calvin & Hobbes anthologies. This oatmeal has been in the back of my mind since I received this book as a gift two years ago, and I am face-palming myself for not making it earlier. The original recipe calls for bananas and walnuts, but I'd encourage you to try this version while rhubarb is in season. It is like eating apple crumble and creme brulée and oatmeal all at the same time, and it has just enough cinnamon and nutmeg to make it feel warm and cozy even when eaten leftover straight out of the fridge.

Baked Oatmeal with Apples, Rhubarb, Almonds, and Pepitas
adapted from Heidi Swanson - serves 6 generously, or 12 as part of a larger brunch spread
This is the dream brunch dish, as you can prep the rhubarb compote the night before, and then easily prep the rest of the ingredients in the morning. Put it in the oven about a half-hour before the meal is slated to begin (it cooks for closer to 40 minutes, but in my experience people are generally a few minutes late to brunch), and it will fill your kitchen with all sorts of lovely smells before people arrive. I've given you proportions for an 8-inch by 8-inch baking dish, but you can easily 1 1/2 or double the recipe to suit your headcount or available baking dish size. I ended up 1 1/2-ing the recipe to fill my oval baking dish; if you do the same, aim for 5-6 apples instead of 3-4.

2 cups rolled oats (not instant oats)
1/2 cup pepitas (raw pumpkin seeds)
2 tablespoons flax seeds
2 tablespoons chia seeds
1/3 cup + 1 tablespoon natural cane sugar (granulated sugar), divided
1 1/2 teaspoons ground cinnamon
1/4 teaspoon freshly grated nutmeg
1 teaspoon aluminum-free baking powder
1/2 teaspoon kosher salt
2 cups milk
1 large egg
3 tablespoons unsalted butter, melted and cooled slightly
2 teaspoons pure vanilla extract
3-4 large apples (Fuji, Pippin and McIntosh apples will all keep their shape when cooked) cored and cut into 1/2-inch thick wedges or slices
1 tablespoon fresh lemon juice
Rhubarb Compote (recipe follows)
1/3 cup sliced almonds
2 tablespoons chopped crystalized ginger, optional

To serve:
Yogurt
Fresh fruit or berries (blueberries, strawberries, or blackberries would all be delicious)

Preheat the oven to 375˚F/190˚C with a rack in the top third of the oven. Generously butter an 8-inch square baking dish, and set aside.

In a bowl, mix together the rolled oats, pepitas, flax seeds, chia seeds, 1/3 cup sugar, cinnamon, nutmeg, baking powder, and salt.

In another bowl, whisk together the milk, egg, half of the melted butter, and vanilla.

In a third bowl, combine the apple slices with the remaining tablespoon of sugar and the lemon juice, and toss to combine. Arrange the apples in the bottom of the buttered baking dish. Spoon the rhubarb compote over the apples (make sure it is distributed relatively evenly). Cover the fruit with the oat mixture. Slowly drizzle the milk-egg mixture over the oats, and gently give the baking dish a couple of thwacks on the counter so the milk evenly soaks the oats. Scatter the sliced almonds and the crystalized ginger, if using, across the top.

Bake for 35-45 minutes, or until the top is nicely golden and the oat mixture is set. Remove from the oven and set aside to cool for a few minutes. Drizzle the remaining melted butter over the top, and serve warm with yogurt and fresh fruit.

Rhubarb Compote (makes 1 1/2 cups)

2 cups sliced rhubarb (about 3-4 stalks)
1/4 cup sugar
a generous pinch of cinnamon

Combine the rhubarb, sugar, cinnamon, and a splash of water in a heavy-bottomed pot. Set the pot over low heat and bring to a simmer. Cook, stirring occasionally, until the rhubarb begins to break down and turns rosy in color, about 10 minutes, adding more water if necessary to keep it from burning on the bottom of the pan. Taste, and add more sugar if necessary (I like my compote slightly tart).