FIELD & FOREST

apples

marie-hélène's apple cake with cardamom and orange blossom

autumn, breakfast, desserts, sweet, vegetarian, winterRachel SandersComment

Being a grownup is hard. You have to deal with unforeseen and sometimes high-stress life situations, you have to keep a level head when really you feel like exploding all over the place, and you are solely responsible for managing your cake intake. I feel like we're doing okay with the first two things this week, given that we've been experiencing some wily circumstances (long story for a future post), but to say I managed my cake intake would be a gross overstatement.

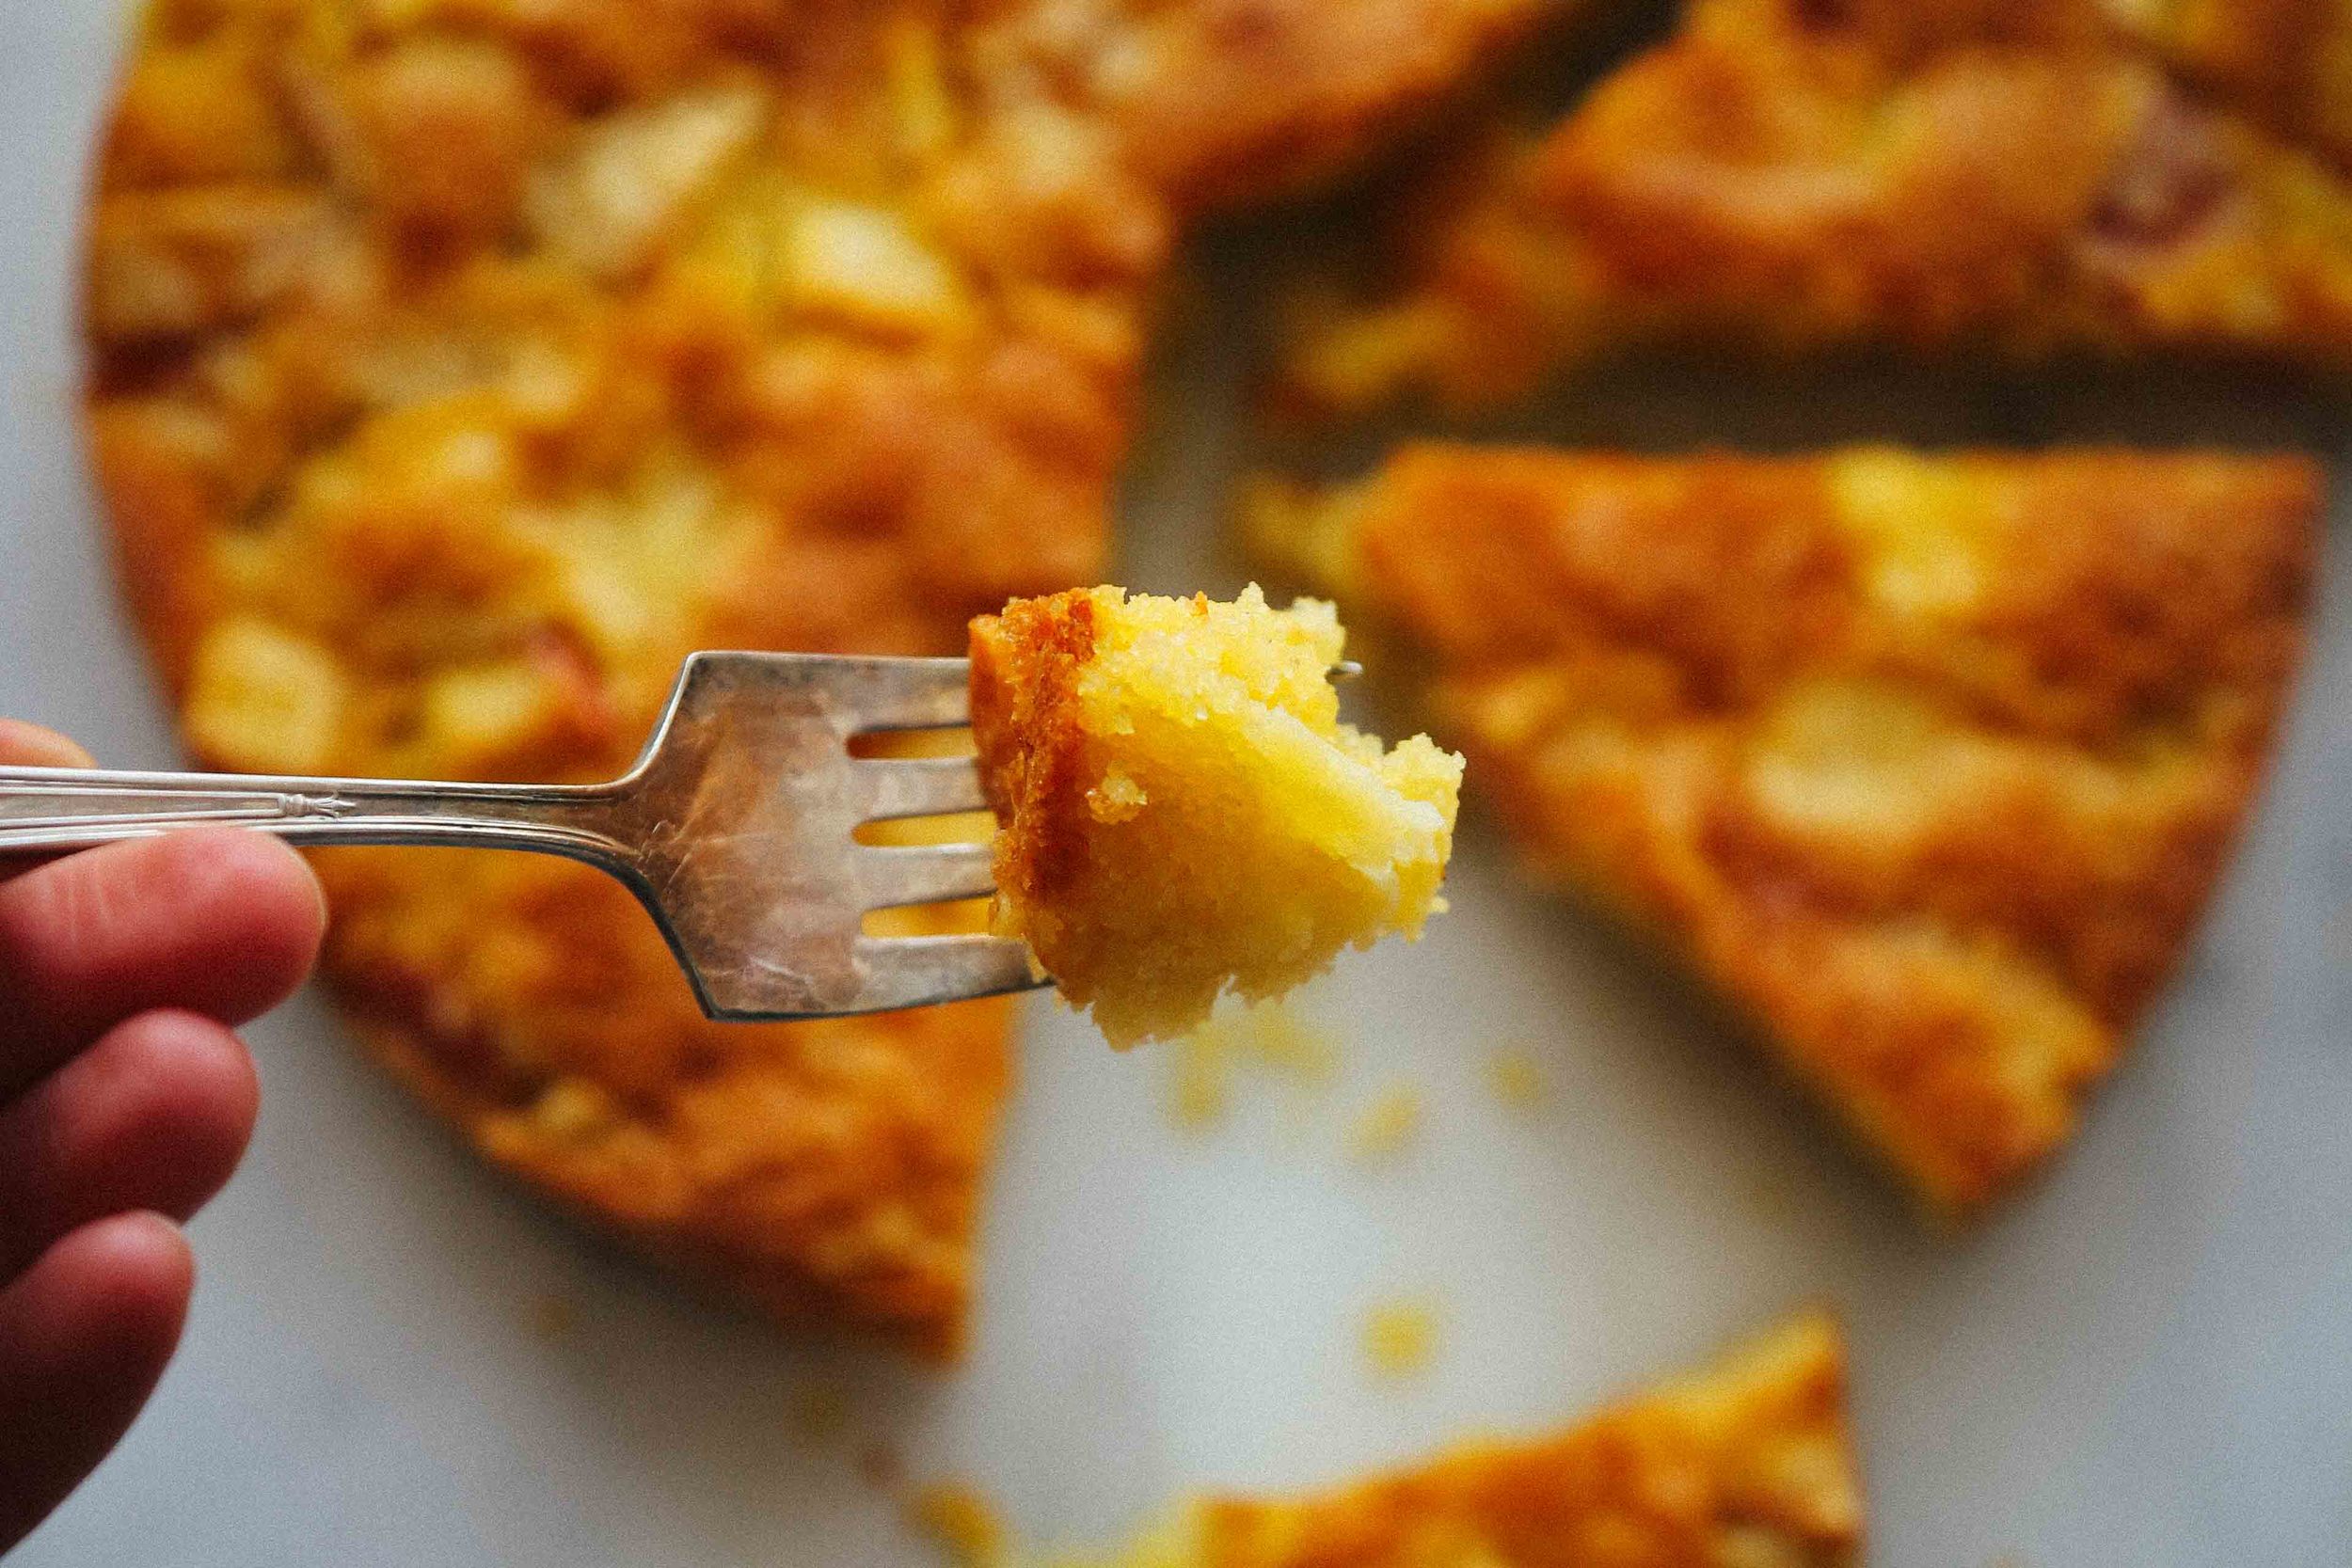
This is a good cake to keep around in these kinds of times, primarily because it is delicious, but also because it is mostly apples! So eating a bunch is NBD. Which is good, because I'm actually eating another piece as I write this post. #grownupdecisions

(Update: this cake is now gone! We ate it all. Sorry/not sorry, local friends.)

I feel that I must point out that the original recipe for this cake (from Dorie Greenspan) contained rum instead of the cardamom and orange blossom water. Rum and I haven't been friends since an unfortunate incident in college involving a very boozy drink served in a hollowed-out pineapple, hence the change in flavor additions. But if you would like to go Dorie's route, nix the cardamom and orange-blossom water and add in 3 tablespoons of rum. I think I'm going to make this with 3 tablespoons of Applejack (brandy and I are still friends) and a pinch of cinnamon and nutmeg next time, so I'll let you know how that goes when I give it a try.

I would like to say, though, that the cardamom and the orange blossom water made the whole thing smell REALLY good while it was baking. Really, stupid good. Plus, even without the booze, the cake was still incredibly moist and never dried out, even though we left it unwrapped as per the original recipe's instructions. That is impressive for any cake in our bone-dry state.

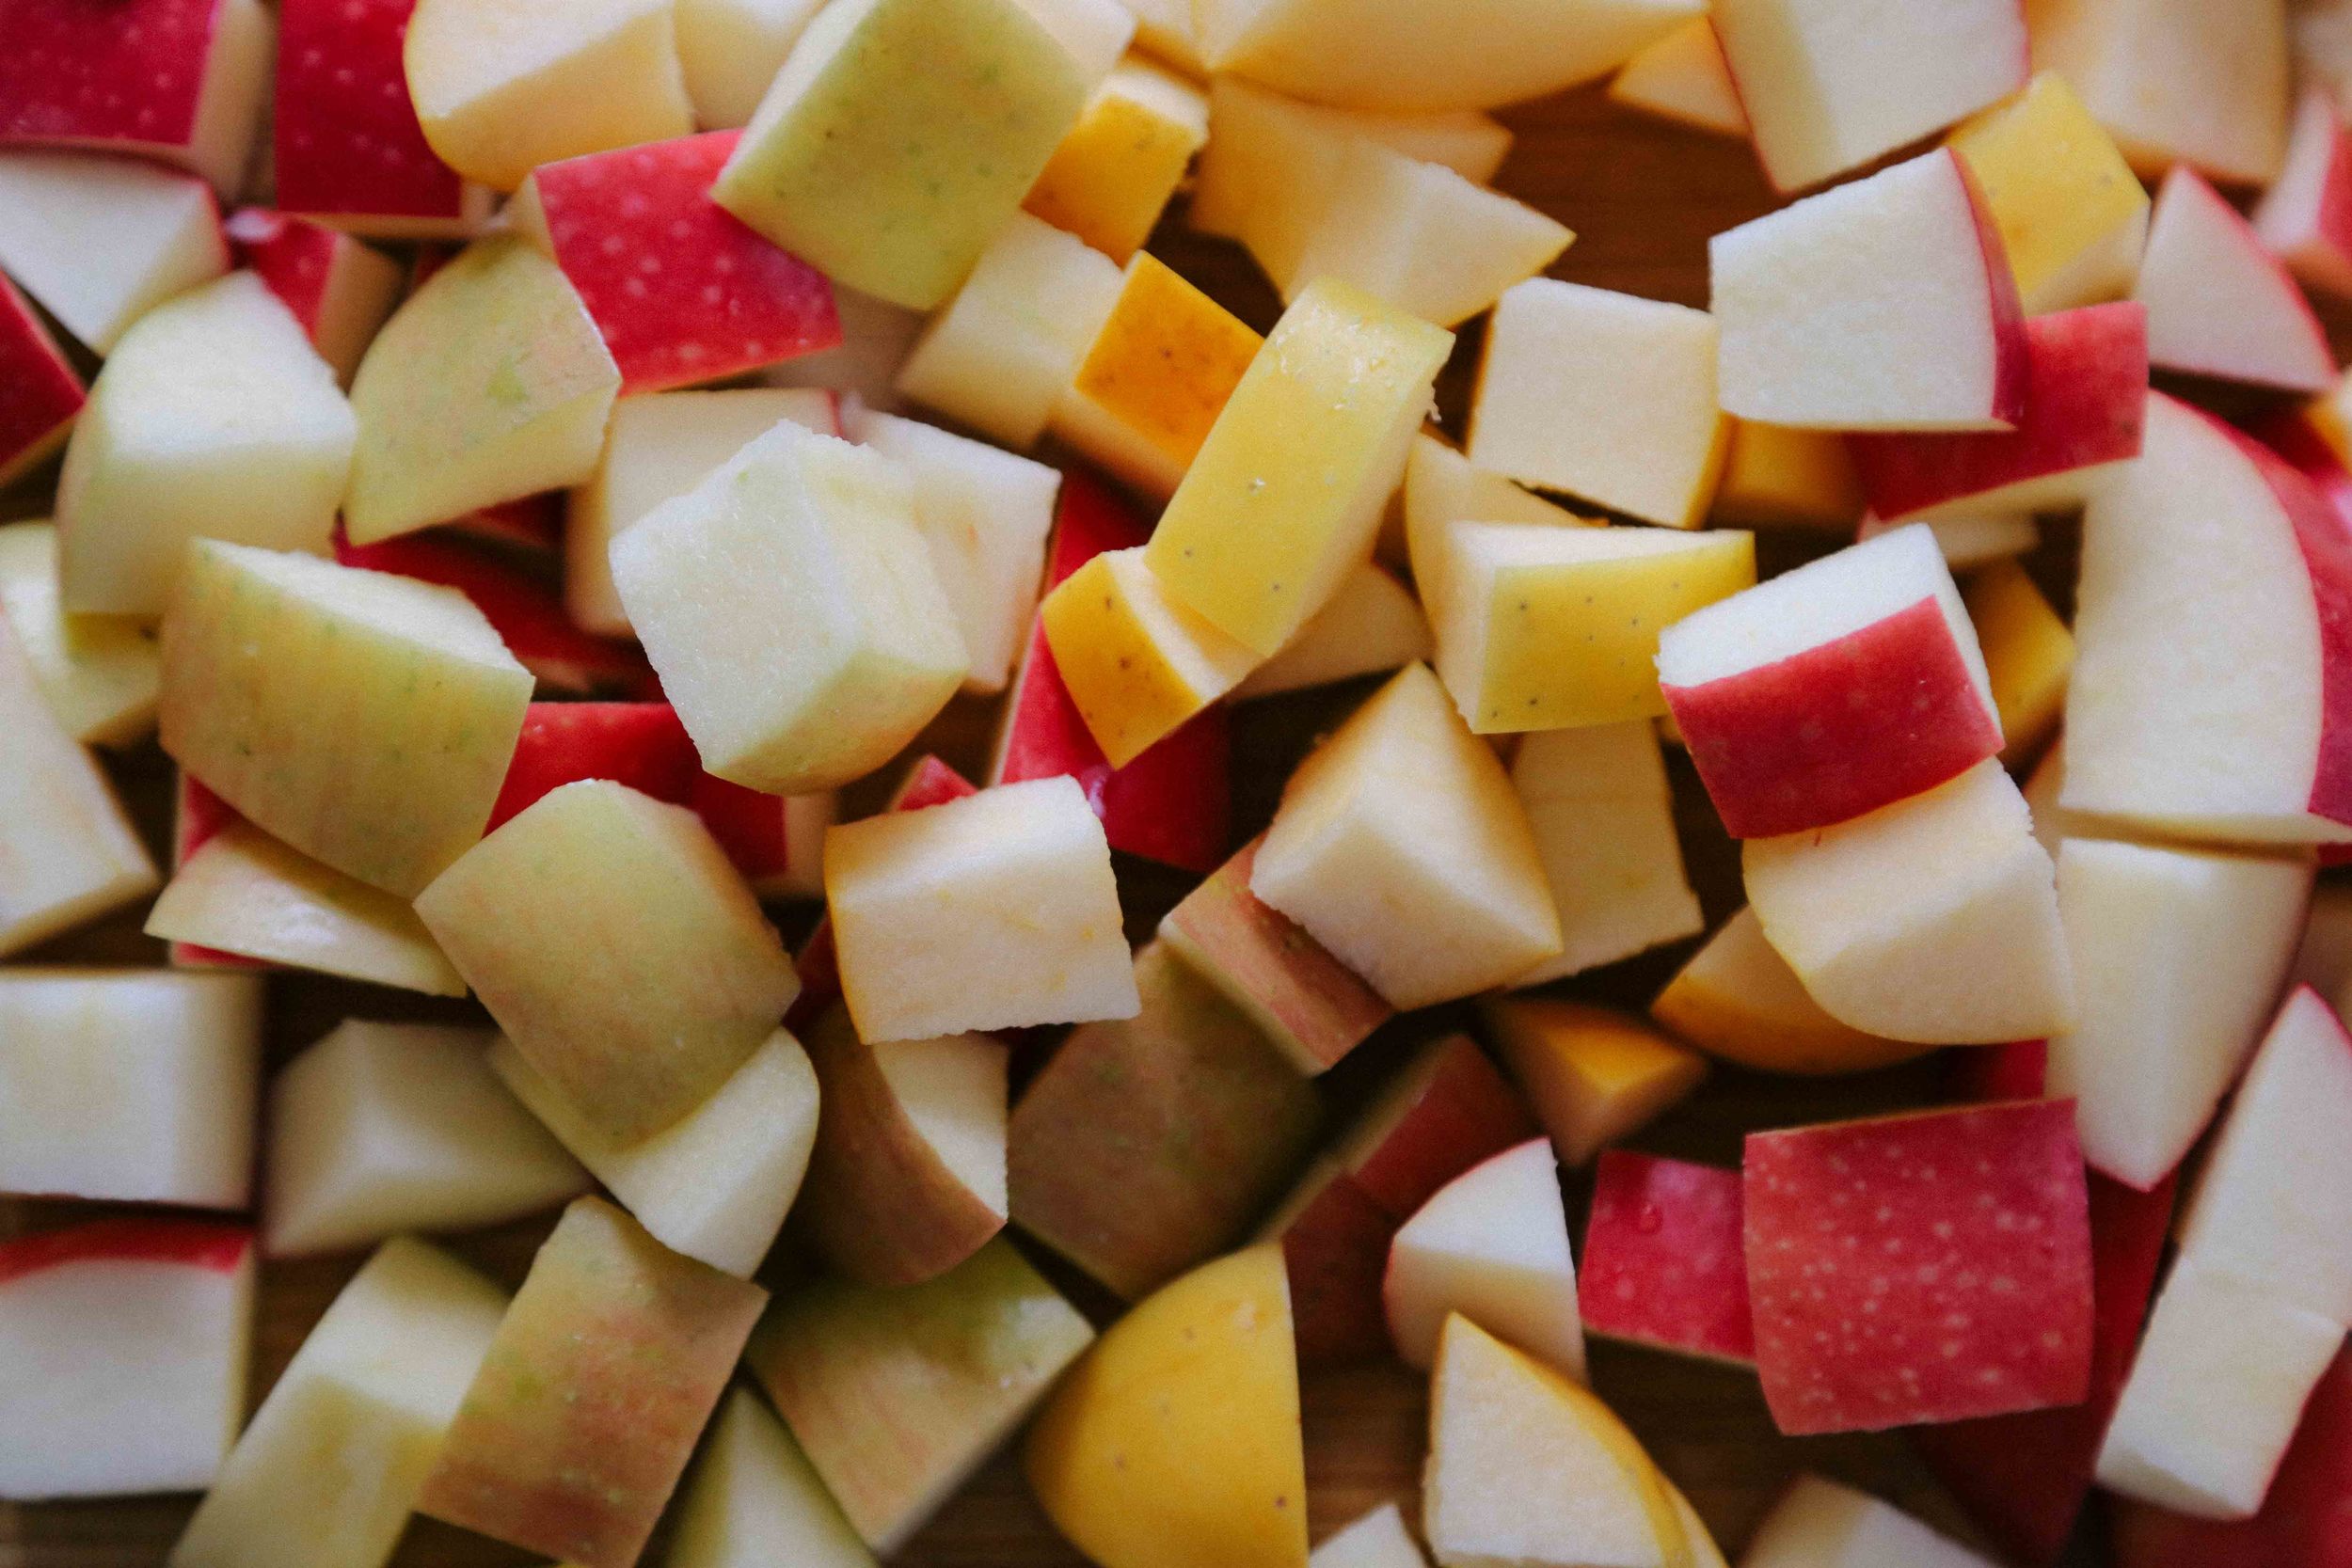
One more note: there really are a lot of apples in this cake! It won't feel like there's enough batter to hold them all, but there is, trust me. You can move the apples around a bit in the pan to spread out the mixture evenly, but believe that the batter will help to fill in the cracks and empty parts.

makes one 9-inch cake - serves 8 (or maybe just 2)
(adapted from Dorie Greenspan's recipe in Genius Recipes)
 

I didn't peel my apples when I made this cake, and I'm very happy I made that decision. Because I used some Pink Lady Apples, the bright pink peel caused the apple flesh to blush in the oven, and gave this cake really lovely pops of pink. Plus, I feel that there is enough flavor in the peel that I'm more than willing to risk the slight hesitation in texture it gives to each bite. You may peel your apples if you disagree.


3/4 cup all-purpose flour
3/4 teaspoon baking powder
pinch of salt
1 teaspoon cardamom (freshly ground, if possible)
4 large apples (use different kinds, if you can! I used two Pink Lady, one Fuji, and one Opal)
2 large eggs
3/4 cup sugar
2 teaspoons orange blossom water
1/2 teaspoon pure vanilla extract
1/2 cup unsalted butter, melted and cooled


Place a rack in the center of your oven and preheat the oven to 350˚F. Generously butter and flour an 8 or 9-inch springform pan, and place it on a baking sheet.

Whisk the flour, baking powder, salt, and cardamom together in a small bowl. Cut the core from the apples and cut the apples into 1-inch chunks.

Break the eggs into a large bowl and whisk until foamy. Add the sugar and whisk to blend well. Whisk in the orange blossom water and vanilla extract. Add half the flour mixture to the bowl and whisk until just combined. Add half of the butter mixture and whisk until just combined. Repeat with the remaining flour and butter, mixing gently after each addition. You will have a smooth, thick batter.

Using a rubber spatula, fold in the apples, turning the fruit so that it is coated with batter. Scrape the mixture into the prepared springform pan, and move it around a bit so that there aren't any large holes or gaps, and so the mixture evenly reaches the inner walls of the pan.

Slide the baking sheet with the pan into the oven, and bake for 45-60 minutes (begin checking the cake at 45 minutes), until the top of the cake is golden brown and the center of the cake springs back when touched. Transfer to a cooling rack and let rest in the pan for 5 minutes.

Carefully run an icing spatula or a thin knife between the cake and the pan, and remove the sides of the springform pan, making sure there aren't any apples stuck inside the pan. If you want to remove the bottom of the springform pan from the cake, wait until the cake is almost completely cooled and run a long spatula between the pan's bottom and the cake. Cover the top of the cake with a piece of waxed paper or a clean, lint-free dishtowel, and invert onto a rack. Carefully remove the bottom of the pan and re-invert the cake onto your serving plate.


We ate this warm, at room temperature, and after it had sat around for a bit. It is great each and every way! Dorie recommends NOT wrapping this cake, as it is so moist that it will cause the nice, crusty edges of the cake to become a bit soggy. After testing this cake in one of the driest states in the Union, we concur. Simply place a piece of waxed paper against to cut parts of the cake to keep them from drying, or just cut off any dry-ish parts before serving and eat them yourself. :)


baked oatmeal with apples, rhubarb, almonds, and pepitas

autumn, breakfast, desserts, spring, sweet, winterFieldandForest2 Comments
4j5a5904.jpg

I know, I know... what, pray-tell, is this apple and nut-crumbly topped thing doing here in May. Would you believe that the Northern Utah high desert, land of the fourteen-day spring, has developed a Seattle-esque languor of thunderstorms and wind? That we've been slathering on sunscreen in the morning only to throw on our rain shells and boots in the afternoon (or vice versa)? That I haven't had to water my garden once in the past week and a half? That the ski resorts have closed for the season even though we've had an additional 16 inches of snow in the mountains in past 72 hours?

It is crazy-town.

But it's reinvigorated our desire for baked and braised and stick-to-your-ribs things for the time being, as we are feeling these feelings of homebody-ness and the need for thick socks and weekend mornings spent on the carpet with bowl food and Calvin & Hobbes anthologies. This oatmeal has been in the back of my mind since I received this book as a gift two years ago, and I am face-palming myself for not making it earlier. The original recipe calls for bananas and walnuts, but I'd encourage you to try this version while rhubarb is in season. It is like eating apple crumble and creme brulée and oatmeal all at the same time, and it has just enough cinnamon and nutmeg to make it feel warm and cozy even when eaten leftover straight out of the fridge.

Baked Oatmeal with Apples, Rhubarb, Almonds, and Pepitas
adapted from Heidi Swanson - serves 6 generously, or 12 as part of a larger brunch spread
This is the dream brunch dish, as you can prep the rhubarb compote the night before, and then easily prep the rest of the ingredients in the morning. Put it in the oven about a half-hour before the meal is slated to begin (it cooks for closer to 40 minutes, but in my experience people are generally a few minutes late to brunch), and it will fill your kitchen with all sorts of lovely smells before people arrive. I've given you proportions for an 8-inch by 8-inch baking dish, but you can easily 1 1/2 or double the recipe to suit your headcount or available baking dish size. I ended up 1 1/2-ing the recipe to fill my oval baking dish; if you do the same, aim for 5-6 apples instead of 3-4.

2 cups rolled oats (not instant oats)
1/2 cup pepitas (raw pumpkin seeds)
2 tablespoons flax seeds
2 tablespoons chia seeds
1/3 cup + 1 tablespoon natural cane sugar (granulated sugar), divided
1 1/2 teaspoons ground cinnamon
1/4 teaspoon freshly grated nutmeg
1 teaspoon aluminum-free baking powder
1/2 teaspoon kosher salt
2 cups milk
1 large egg
3 tablespoons unsalted butter, melted and cooled slightly
2 teaspoons pure vanilla extract
3-4 large apples (Fuji, Pippin and McIntosh apples will all keep their shape when cooked) cored and cut into 1/2-inch thick wedges or slices
1 tablespoon fresh lemon juice
Rhubarb Compote (recipe follows)
1/3 cup sliced almonds
2 tablespoons chopped crystalized ginger, optional

To serve:
Yogurt
Fresh fruit or berries (blueberries, strawberries, or blackberries would all be delicious)

Preheat the oven to 375˚F/190˚C with a rack in the top third of the oven. Generously butter an 8-inch square baking dish, and set aside.

In a bowl, mix together the rolled oats, pepitas, flax seeds, chia seeds, 1/3 cup sugar, cinnamon, nutmeg, baking powder, and salt.

In another bowl, whisk together the milk, egg, half of the melted butter, and vanilla.

In a third bowl, combine the apple slices with the remaining tablespoon of sugar and the lemon juice, and toss to combine. Arrange the apples in the bottom of the buttered baking dish. Spoon the rhubarb compote over the apples (make sure it is distributed relatively evenly). Cover the fruit with the oat mixture. Slowly drizzle the milk-egg mixture over the oats, and gently give the baking dish a couple of thwacks on the counter so the milk evenly soaks the oats. Scatter the sliced almonds and the crystalized ginger, if using, across the top.

Bake for 35-45 minutes, or until the top is nicely golden and the oat mixture is set. Remove from the oven and set aside to cool for a few minutes. Drizzle the remaining melted butter over the top, and serve warm with yogurt and fresh fruit.

Rhubarb Compote (makes 1 1/2 cups)

2 cups sliced rhubarb (about 3-4 stalks)
1/4 cup sugar
a generous pinch of cinnamon

Combine the rhubarb, sugar, cinnamon, and a splash of water in a heavy-bottomed pot. Set the pot over low heat and bring to a simmer. Cook, stirring occasionally, until the rhubarb begins to break down and turns rosy in color, about 10 minutes, adding more water if necessary to keep it from burning on the bottom of the pan. Taste, and add more sugar if necessary (I like my compote slightly tart).

parsnip, squash, and apple galette with sage-onion jam

autumn, breakfast, vegetarian, winterFieldandForestComment

I have a friend who doesn't eat leftovers.  Yeah, I don't get it either.  He has a (much appreciated) habit of inviting people over to his house, making a crazy amount of amazing food, and then sending us home with to-go containers at the end of the evening.  Once, as he was shooing us out of his house after handing each person a jar of arroz con pollo, I weakly asked him why he didn't want to keep any food for himself.  He shrugged and said, "I just don't eat leftovers."  This seemed like a non-answer, but I was feeling very possessive of my jar at that point so I didn't press him further.  While I, too, love to cook for others, I've recently come to rely on leftovers as crucial ingredients in weekly dinners.  Roasted vegetables, cooked lentils, and grains from previous meals are often added to our frittatas, pastas, and salads, and when we're feeling fancy, galettes.

"Galette" is a French term for a free-form pie, among other things; it can also refer to an open-faced tart or cake, or an open-faced crepe. The great thing about the pie version is that you don't need any random tools or equipment to make one, and they are just as delicious (in my mind) as standard pies and tarts. If you have a cookie sheet, a card table, and a barbecue, you can knock out an amazing galette.  And you probably have a cookie sheet, a kitchen counter, and an oven, so you are over-prepared!

If you have made pies, tarts, or galettes before and have a habit of making pie crust from scratch, here is where I wish you well and send you down the page to the recipe. However, if you generally purchase pre-made pie crusts, you may not want to hear me say this, buuuuut, I really think you should be making your own pie crust (and I'm so glad you're on the other side of your computer screen so you can't punch me). In the time that it takes you to go to the store and buy a pre-made crust, you could have made your own and have it chilling in the fridge for you. And when you make your own, you can add all kind of yummy things to make it special, as I like to do in this recipe.  But pie dough seems intimidating and time consuming, and I completely understand why.  You probably have specific textural end goals (as you should), and you've likely heard people tell you all kinds of things that you absolutely MUST do to make it perfectly flaky and tender!

And now someone else is going to be upset at this next thing I'm going to say, buuuuut, you don't have to follow all of the normal rules to make delicious and flaky pastry.  Full disclosure: I made this pastry dough by pinching. the. butter. into. the. dough. with. my. fingers.

!!!

With my fingers!  Not a food processor or a pastry blender or two knives but the THINGS that are attached to my HANDS!  Sacrilege.

Should you choose to go this heathenish route yourself, a few things will help you along the way.  One, make sure your butter is straight-out-of-the-fridge cold when you begin working it into the flour. Two, should you feel your butter heating up and getting a little melty (i.e. soft and oily), throw the whole bowl (butter, flour, and all) into the fridge for five minutes to cool down. If you're working in a moderately cool kitchen, you probably won't need to put the bowl in the fridge at all (and if you have poor circulation, as I do, this will be one of those rare moments when you will find your icy-cold hands useful). Three, take a deep breath, and know that everything is going to be okay.  You are making something with butter, flour, and seasoning from scratch, and at worst, it is going to taste pretty freaking delicious.

Parsnip, Squash, and Apple Galette with Sage-Onion Jam
There is a lot happening with this recipe, but it is easy to make the components in advance and assemble it just before you're ready to bake; you can easily omit a vegetable and increase another if you aren't a fan of parsnips or squash, though I really like the added sweetness of the apples so I encourage you to keep them in the mix.  If you prefer a juicier galette, use an apple variety that breaks down during cooking, such as Golden Delicious; for a richer tart, dot the filling with goat cheese before you fold up the sides of the pastry.

Pastry (base recipe adapted from Thomas Keller; additions inspired by traditional flavorings for gougeres) - makes enough for two galettes, two tarts, or one double-crust pie
2 cups all purpose flour
1/2 cup wheat flour
1 teaspoon kosher salt
1/2 teaspoon freshly grated nutmeg
1/2 teaspoon dry mustard
a few good grinds of black pepper
1/2 cup freshly grated hard cheese, such as Pecorino-Romano (which is what I used) or parmesan 2 1/2 sticks cold butter
5 tablespoons ice water (or possibly more)

Sage-Onion Jam
2 tablespoons butter + 1 teaspoon butter, divided
2 medium yellow onions, thinly sliced from top to tail
Kosher salt
2 teaspoons dark brown sugar
A splash of apple cider vinegar
2 tablespoons freshly chopped sage

Filling
3-4 cups roasted vegetables (such as parsnips, carrots, butternut squash, sweet potatoes, or a mixture; I used parsnips and squash, though I might omit the parsnips next time as their flavor is a bit strong)
1 apple (I used a Fuji, because it was what I had on hand, but use whatever you would like; baking apples, such as Granny Smith, will get softer than Fuji)
2 tablespoons butter, divided
juice of one lemon, divided
fried sage leaves for garnish (make by heating a little butter in a pan and frying the sage leaves until crisp but still green)

Make the pastry: combine the all-purpose flour, wheat flour, kosher salt, nutmeg, dry mustard, black pepper, and grated cheese in a bowl, and whisk to combine.  Cut the butter into 1/2-inch pieces and drop into the bowl with the flour (alternatively, you may combine the flour and butter in a food processor).  Cut the butter into the flour using a pastry cutter, or pinch the butter into the flour with your fingers, breaking up the butter into smaller pieces as you go (or pulse your food processor a few times to break up the butter into smaller pieces).  You should end up with pea-sized (or smaller) nuggets/little smears of butter throughout the flour.

Drizzle the ice water over the butter-flour mixture, and mix (or pulse) to combine.  The dough should be crumbly, but should stick together when pinched with your fingers (if it does not stick together, add a little more water, a tablespoon at a time).  Press the dough into itself a couple of times while still in the bowl, just until you're sure it is mostly coming together.  Turn the dough out onto a work surface, and divide it into two equal (albeit, crumbly) pieces.  Press each piece into a flat disk, and wrap both tightly in plastic wrap.  Set in the fridge to chill for at least one hour, or up to three days (the dough will be eatable after this point, but the flour may oxidize and become grayish).

Make the sage-onion jam: melt the butter in a heavy-bottomed pan set over medium-low heat.  Add the onions, and stir to coat evenly with the melted butter.  Add a pinch of salt to let the onions sweat; you want them soften at this point, but not brown.  Listen to the onions as they sweat, and if you notice that the sound seems loud, it is likely that your pan is too hot and the onions are beginning to crisp.  Stir occasionally so that the onions cook evenly.

Once the onions have softened, add the dark brown sugar and turn up the heat to medium.  Let the onions cook, stirring occasionally, so that the sugars caramelize and the onions begin to brown.  They will move from pale beige, to golden brown, to a light caramel.  Once they reach this light caramel stage, turn up the heat a notch, add the vinegar, and stir to scrape up any onion bits stuck to the pan.  Continue cooking the onions until they reach a deep caramel color.

Scoot the onions to one side of the pan, and melt the teaspoon of butter in the empty space in the pan.  Add the sage to the melted butter, keeping it separate from the onions while it cooks.  Once it has crisped and the color has changed to a dark, muted green (this will take about a minute), mix the sage into the onion mixture.  Cook for a minute or two more, stirring frequently, then remove from the pan and let cool.  Scrape the mixture out onto a cutting board, and run your knife through it a couple of times (this will make the mixture less stringy and more jammy).  Taste and add additional salt if needed.  Set aside, or refrigerate in a covered container for up to 1 week.

To fill and shape the tarts: preheat the oven to 375 degrees F, and line a baking sheet with parchment paper. Remove the pastry disks from the fridge, and let sit, still wrapped, at room temperature for 10-20 minutes.  Unwrap one disk, and place it on a lightly floured work surface. Roll the pastry into a 1/8" thick circle, and transfer to one side of the parchment lined baking sheet.

Slice the apple into pieces, and set aside.  Spread half of the sage-onion jam in the middle of the pastry round, leaving a 2-inch border of bare pastry.  Mound half of the roasted vegetables on the jam, and tuck half of the apple slices among the vegetables.  Fold the pastry up and over the vegetables, overlapping the folds so that there are no places where the filling can escape.  Once the pastry is all folded, press around the tart gently to seal the pastry folds.  Gently scoot the galette to one side of the pan to make sure there is enough room for the second galette.  Repeat with the second pastry disk and remaining vegetables and jam.

Once both galettes are filled, cut one tablespoon of butter into pieces and scatter over the top of both tarts.  Sprinkle the exposed vegetables and apples with the lemon juice.  Bake at 375-degrees for 15 minutes, then lower the heat to 350 and bake for another 10-20 minutes, or until the pastry is fully cooked and golden brown.  Top with the fried sage leaves, and serve warm or at room temperature with a green salad.  You may also refrigerate the tart for up to two days;let it come to room temperature, or rewarm it in a 300-degree oven for 10-15 minutes before serving.

remedy wassail with lemon, orange, and ginger

autumn, drinks, vegetarian, winterFieldandForestComment

My throat started itching today.  Just a little, but enough for me to notice and think "Whoa, there, let's nip this in the bud before it turns into something else."  I've been trying to take note of how I am feeling physically this week, as things are very (very) busy in our lives and my body has a tendency to go-go-go-STOP when I let things like sleep and exercise slide.  Which I have, so itchy throat mystery solved.

I've taken a leaf out of my friend Bryan's book and made a batch of wassail to keep in the fridge and heat up when I need a quick boost. (Hi, confused Jewish friends! You probably don't know what wassail is, but apparently there is a Christmas carol about it? And it is a festive drink that people used to have on hand to serve to Christmas carolers? Yeah, I didn't know that either. I also kept spelling it like "wassel" since I'm pretty sure that's how it is pronounced, and now that I've looked it up, I can't help but say "wasSAIL" in my head as I am writing this. Today has been quite the cultural education.) My version is made with apple cider heated with orange and lemon slices and spiked with cinnamon, cloves, and fresh ginger. It is mulled cider's bright and citrusy cousin, and it is working wonderfully to cut through all the fuss going on inside of my nose and throat.

Is this recipe traditional?  I honestly have no* idea.  But it is delicious, so hopefully that will speak for itself.


Wassail
Makes 4 cups
This recipe scales wonderfully, so make as much or as little as you like.  Store leftover wassail in the fridge and enjoy cold or warmed.

4 cups apple cider (the best you can find)
2 cinnamon sticks, plus more for serving
3 whole cloves
1 orange (Valencia or navel), thinly sliced
1 Meyer lemon, thinly sliced
5 slices fresh ginger, each slice about the size and thickness of a nickel

Combine the cider and the rest of the ingredients in a small saucepan and set over medium-low heat.  Heat for 5-10 minutes, until the wassail barely comes to a simmer.  Strain the warm wassail into teacups or mugs, and serve with cinnamon sticks on the side.

Note: you can hold the wassail in a slow-cooker or over a low flame at a low heat, but keep in mind that the flavors will be stronger the longer the wassail is heated (which you might prefer), and the citrus will eventually begin to disintegrate.

*Well I just did some research, so now I have some idea. And apparently the traditional version has a lot of booze.  So no, it is not traditional, but it is better** for whatever ails you. **Arguably.

buckwheat bowl

salads, spring, vegetarian, winterFieldandForestComment

We had some mixed reviews on this dish in our household.  I think that cooked buckwheat can sometimes have a bit of a slimy texture, similar to okra; some people like/don't mind this, while others aren't huge fans.  That said, it has a nicely nutty flavor and light texture that make it an ideal base for more substantial counterparts.

Feel free and sub whatever is in season or in your refrigerator, though including something with a little bite (here, the red onion) with some cheese and nuts will really add another dimension to your bowl; you can also change your grain base to something like barley or quinoa if you're not stoked on buckwheat.  In case you need inspiration for a variation, I think I'll be trying this again with fresh figs, arugula, goat cheese, and balsamic in a few weeks. :)

Buckwheat Bowl

I'm going to give you an elemental breakdown of this recipe, since really this is just piling a bunch of stuff on top of some kind of grain in a bowl.  I hereby give you creative license to throw in whatever feels right to you in any/all of the outlined categories, and I promise to post further winning combinations as we test them ourselves.

Grain: buckwheat
Cheese: sheep's milk feta
Roughage: arugula, sliced raw beets, apple/celery root/onion slaw (made by thinly slicing each ingredient and mixing with lemon juice and a tiny bit of oil), avocado
Legume: chickpeas
Nut: walnuts